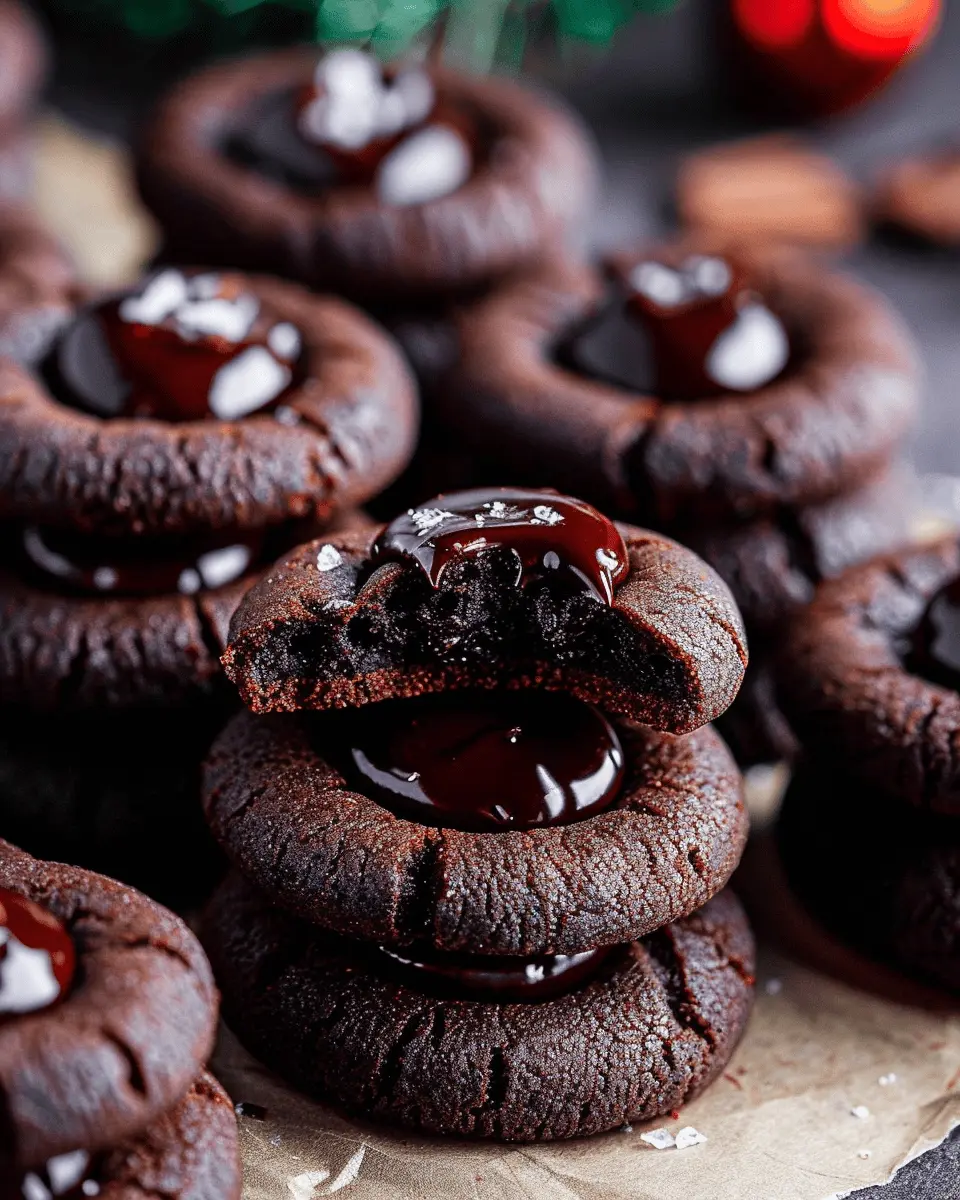
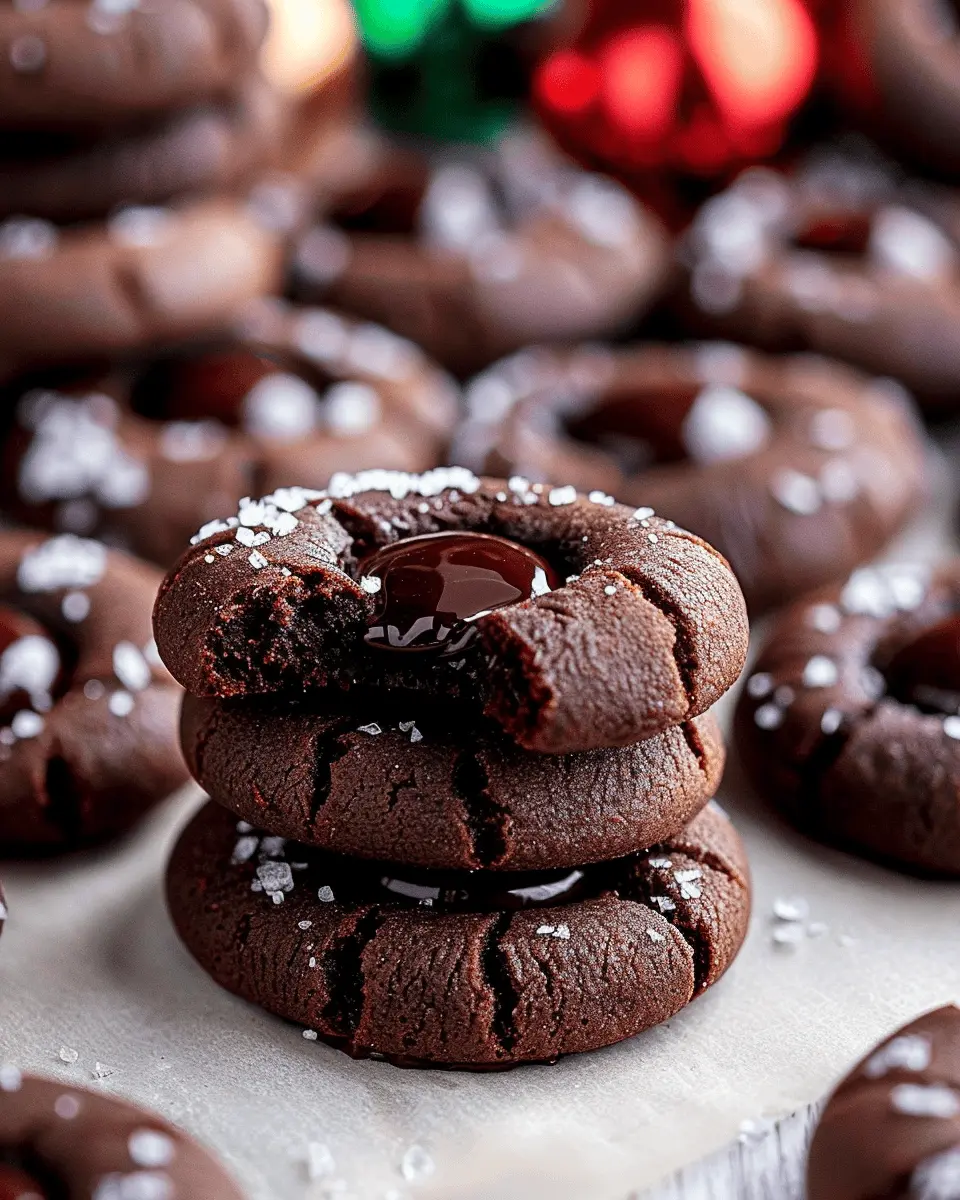
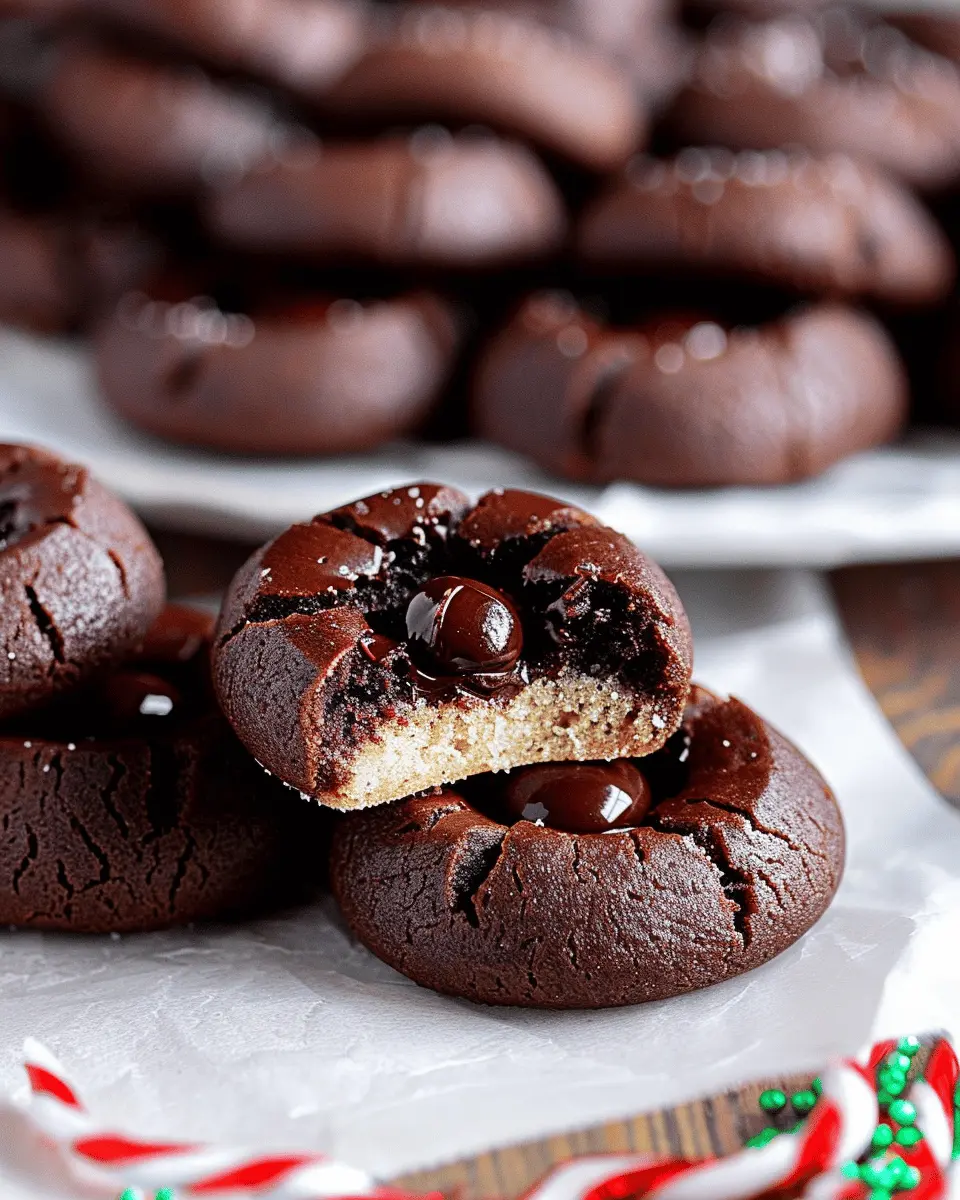
Introduction to Chocolate Thumbprint Cookies
Are you in search of a delectable treat that marries simplicity with indulgence? Look no further! Chocolate Thumbprint Cookies are not only a delight to the taste buds but also a feast for the eyes. These cookies, characterized by their rich chocolate flavor and a signature thumbprint that holds a dollop of your favorite filling, have become a staple in many homes. Whether you’re sharing them with friends or savoring them during a well-deserved break, these cookies are bound to impress.
Why Choose Chocolate Thumbprint Cookies?
The appeal of Chocolate Thumbprint Cookies lies in their versatility. You can fill these delicious morsels with a variety of fillings — from fruity jams to luscious chocolate ganache. This means you can easily customize them to suit your mood or occasion. Plus, they are perfect for those moments when you want something homemade but don’t have hours to spend in the kitchen. The basic dough comes together quickly, and before you know it, you’ll have a batch of goodies ready for sharing or indulging.
Did you know that baking can actually reduce stress? According to the research published by the American Psychological Association, engaging in simple baking tasks can improve your overall mood. So why not whip up some Chocolate Thumbprint Cookies as a sweet treat that also doubles as a way to unwind?
The Perfect Treat for Young Professionals
Let’s face it: life as a young professional can be a balancing act. Between meetings, deadlines, and trying to carve out personal time, you deserve a little joy. Chocolate Thumbprint Cookies are not only easy to make; they’re also a great way to impress your colleagues or friends. Imagine bringing these cookies to the office or a gathering – everyone will be raving about them and asking for the recipe.
With their minimal ingredients and straightforward preparation, these cookies fit seamlessly into your busy lifestyle. They also make an excellent homemade gift, showcasing your culinary skills without requiring extensive time or effort in the kitchen. You can even create a themed batch for different occasions, ensuring your culinary creativity shines through.
So grab your apron, pull up a chair, and let’s embark on this baking adventure together. Your new favorite cookie awaits!
Ingredients for Chocolate Thumbprint Cookies
If you’re ready to dive into the world of Chocolate Thumbprint Cookies, let’s talk about what you’ll need to make these delightful bites of goodness.
Essential Ingredients for the Dough
The base for these cookies is both simple and satisfying. Here’s what you’ll need:
- 1 cup unsalted butter: Make sure it’s softened for easy mixing.
- 1/2 cup granulated sugar: This adds a touch of sweetness.
- 2 cups all-purpose flour: This will create the cookie base.
- 1/4 cup unsweetened cocoa powder: To give those cookies a rich chocolatey flavor.
- 1/4 teaspoon salt: Balances the sweetness nicely.
- 1 teaspoon vanilla extract: For an extra layer of flavor.
These ingredients combine to create a soft, melt-in-your-mouth texture that pairs perfectly with the filling. Want to learn more about the best flours for baking? Check out this comprehensive guide on baking flour options.
Ingredients for the Ganache
To elevate your Chocolate Thumbprint Cookies, you’ll need a luscious ganache. Here’s what you’ll grab for that:
- 1 cup semi-sweet chocolate chips: For that rich chocolate experience.
- 1/2 cup heavy cream: Helps create a smooth and glossy finish.
With these fabulous ingredients, your cookies will be the hit of any gathering! And remember, the beauty of this recipe lies in the balance of flavors—don’t skimp on quality. Dive in and enjoy your baking adventure; you won’t regret it!
Preparing Chocolate Thumbprint Cookies
Crafting the perfect Chocolate Thumbprint Cookies can be one of those delightful kitchen adventures that not only fills your home with amazing aromas but also satisfies your sweet tooth! Buckle up as we guide you through each step of the process with little tips along the way.
Gather Your Ingredients
Before diving into the mixing and baking, let’s ensure your kitchen is stocked with everything you’ll need. Here’s a quick list for your Chocolate Thumbprint Cookies:
- 1 cup of all-purpose flour
- 1/4 cup unsweetened cocoa powder
- 1/2 teaspoon baking soda
- 1/4 teaspoon salt
- 1/2 cup unsalted butter, softened
- 1/2 cup granulated sugar
- 1/4 cup brown sugar
- 1/2 teaspoon vanilla extract
- 1 large egg yolk
- Your favorite chocolate ganache or jam for filling (like raspberry or strawberry for a fruity twist)
Feeling a little uncertain about where to find these ingredients? Local grocery stores or specialty food shops often carry high-quality items, and online retailers like Thrive Market or Amazon can be convenient alternatives.
Prepare the Cookie Dough
Now that you have everything assembled, let’s whip up some delicious cookie dough.
- In a medium bowl, combine the flour, cocoa powder, baking soda, and salt. Whisk it gently to remove any lumps and ensure even mixing.
- In a larger bowl, beat the softened butter, granulated sugar, and brown sugar until you have a light and fluffy mixture. This is the secret to airy cookies!
- Add in the vanilla extract and the egg yolk, mixing until well incorporated.
- Gradually mix the dry ingredients into the wet mixture until it forms a smooth dough.
Say goodbye to chunky dough! Don’t forget to give it a taste—it’s the best part!
Shape the Cookies
Let’s get creative with shaping those thumbprints! Using your hands, roll the dough into small balls, about one inch in diameter.
- Place the rolled dough balls onto a baking sheet lined with parchment paper.
- Use your thumb or the back of a measuring spoon to create a small indentation in the center.
Getting that thumbprint just right is what makes a thumbprint cookie so special. Make sure the indents are deep enough to hold all that luscious filling later!
Chill the Dough
After shaping, the dough needs a little rest. Chill the cookies in the refrigerator for at least 30 minutes. This step is crucial for helping them maintain their shape while they bake.
Bake the Cookies
Preheat your oven to 350°F (175°C) and once ready, it’s time to bake!
- Pop the chilled cookie dough in the oven and bake for about 10-12 minutes.
- Keep an eye on them; the edges should look firm while the center remains slightly soft.
Pro tip: If you notice the thumbprints have lost their shape during baking, gently reshape them with the back of a spoon right after taking them out.
Make the Ganache
While the cookies cool, let’s prepare a simple chocolate ganache!
- Heat 1/2 cup of heavy cream in a small saucepan until just simmering.
- Pour it over 1 cup of chopped dark chocolate or chocolate chips in a bowl and let it sit for a minute.
- Stir until smooth, and voilà! You’ve got yourself a velvety ganache.
This part is where you can get creative! Consider adding a splash of coffee or a pinch of sea salt for that extra flavor.
Fill the Cookies
Finally, it’s time for the sweet finish! Once your cookies have completely cooled, fill each thumbprint with a dollop of ganache. Use a piping bag or just a spoon for this step.
Your Chocolate Thumbprint Cookies are now ready to impress! Allow the ganache to set slightly before indulging.
Now it’s your turn to get baking—these cookies are perfect for a cozy night in, a gathering with friends, or even a thoughtful gift. Happy cookie-making! If you need any more tips or variations, just reach out!
Variations on Chocolate Thumbprint Cookies
When it comes to Chocolate Thumbprint Cookies, the possibilities are endless! Here are some delightful variations that can elevate your cookie game and impress your friends.
Nutty Thumbprint Cookies
Why not add a nutty twist? Simply stir in your favorite chopped nuts, like hazelnuts or walnuts, into the dough. Not only do they enhance the flavor, but they also add a delightful crunch. For a richer experience, try drizzling some melted nut butter, like almond or peanut, into the thumbprint before baking. The creamy texture pairs perfectly with the chocolate!
Fruit-filled Thumbprint Cookies
If you’re looking for a lighter option, fruit-filled Chocolate Thumbprint Cookies are a fantastic choice. Consider filling the thumbprint with your favorite fruit preserves such as raspberry, strawberry, or apricot. The sweetness of the fruit balances beautifully with the richness of the chocolate cookie. You could also experiment with homemade curds; lemon or passion fruit curd adds a tangy kick that’s simply irresistible.
Gluten-free Thumbprint Cookies
For those on a gluten-free diet, adapting your Chocolate Thumbprint Cookies is easier than you think! Replace regular flour with almond flour or a gluten-free flour blend. Both provide a lovely texture while maintaining the cookies’ delicious taste. Just make sure to verify that your fillings are also gluten-free to ensure everyone can enjoy these treats without worry.
Each variation brings its own unique flavor and fun to the classic Chocolate Thumbprint Cookies. So whether you’re a nut lover, a fruit enthusiast, or seeking gluten-free options, these ideas can inspire your next baking adventure. Explore more about cookie variations here.
Baking Tips for Chocolate Thumbprint Cookies
Proper Measurements for Success
When baking Chocolate Thumbprint Cookies, precise measurements are crucial for achieving that delightful texture we all crave. Use a kitchen scale for accurate ingredient proportions, especially if you’re working with flour and sugar, as slight variations can alter your cookie’s outcome. It’s also helpful to spoon the flour into your measuring cup instead of scooping, which can lead to overpacking and heavy cookies. Keeping your butter at room temperature allows for a smoother mix, creating that perfect cookie consistency.
Achieving Perfect Chocolate Ganache
A luscious ganache makes all the difference in your Chocolate Thumbprint Cookies. To whip up the perfect ganache, begin with high-quality chocolate—look for those with at least 60% cocoa for that rich flavor. Chop the chocolate into small pieces to ensure it melts evenly when combined with hot cream. Remember to let the ganache cool slightly before filling your cookies; this prevents it from running off the sides. Looking for more tips? Visit Baker’s Authority for deeper insights into chocolate and baking expertise!
Serving Suggestions for Chocolate Thumbprint Cookies
Creative Ways to Serve
When it comes to Chocolate Thumbprint Cookies, presentation can elevate your baking game! Consider arranging them on a tiered cake stand for a touch of elegance at a gathering. For a more casual vibe, place them in a fun mason jar, tied with twine for an inviting rustic feel. You could even pair them with a homemade whipped cream topping or sprinkle some sea salt on top for that sweet-savory contrast.
Pairing Suggestions
Pairing is key to enhancing the experience of enjoying your cookies. For a delightful afternoon pick-me-up, serve your Chocolate Thumbprint Cookies alongside a rich espresso or a velvety hot chocolate. If you prefer something refreshing, a glass of cold milk or even a bowl of vanilla ice cream can complement the cookies beautifully.
Feeling adventurous? Whip up a homemade fruit compote—like raspberry or strawberry—and drizzle it over your cookies for a burst of flavor! For more ideas, check out this resource on dessert pairings to discover endless possibilities!
By being a little creative with your serving suggestions, your Chocolate Thumbprint Cookies can truly shine and become the star of your dessert table!
Time Breakdown for Chocolate Thumbprint Cookies
Preparation Time
Making Chocolate Thumbprint Cookies doesn’t have to be a race against the clock! You’ll need about 15–20 minutes for preparation. This is when you’ll gather your ingredients, mix the dough, and shape it into those cute little rounds. Don’t rush this step—taking your time helps ensure those cookies achieve that perfect consistency.
Baking Time
Once your cookies are prepped, they’ll need about 10–12 minutes in the oven, where the magic really happens. As they bake, the tempting aroma of chocolate will fill your kitchen, making you wish the timer would speed up!
Total Time
All in all, you’re looking at about 30–40 minutes from start to finish. That means you’ll have freshly baked Chocolate Thumbprint Cookies in no time, perfect for a quick treat or an afternoon snack. So why not bake a batch this weekend? For extra inspiration, check out this baking guide to explore more cookie methods!
Nutritional Information for Chocolate Thumbprint Cookies
Calories and Macronutrients
When savoring Chocolate Thumbprint Cookies, it’s essential to keep your nutritional goals in mind. Each cookie typically contains around 100 calories, packed with valuable macronutrients:
- Fat: 4 grams
- Carbohydrates: 15 grams
- Protein: 1 gram
These cookies can be a delightful treat that doesn’t completely derail your diet, especially when enjoyed in moderation. For a deeper understanding of what’s in your food, check out the USDA FoodData Central for comprehensive nutritional data.
Tips for Healthier Alternatives
Looking to make your Chocolate Thumbprint Cookies a bit lighter? Consider these alternatives:
- Sweetener Swap: Use natural sweeteners like honey or maple syrup instead of refined sugar to add flavor without the calorie surge.
- Whole Grain Flour: Substitute all-purpose flour with whole wheat or oat flour for added fiber and nutrients.
- Nut Butters: Replace traditional butter with almond or peanut butter to increase healthy fats.
With these simple adjustments, you can enjoy these delightful cookies without sacrificing your health goals. For more tips on healthy baking, visit the American Heart Association’s website.
FAQs about Chocolate Thumbprint Cookies
How do I store leftover cookies?
To keep your Chocolate Thumbprint Cookies fresh and delicious, store them in an airtight container at room temperature. They’ll typically last for about a week—though they’re so good, you might find they disappear much faster! If you want to extend their shelf life, consider refrigerating them. Just make sure they’re completely cool before sealing them up, as excess moisture can turn your cookies soggy. If you want to get super fancy, you can freeze them for up to three months. Just wrap them tightly in plastic wrap and place them in a freezer-safe container. When you’re ready to enjoy, let them thaw at room temperature!
Can I use different types of chocolate?
Absolutely! While the classic recipe usually calls for dark chocolate, feel free to experiment with different types. Semi-sweet chocolate, milk chocolate, or even white chocolate can create unique flavor profiles for your Chocolate Thumbprint Cookies. Just remember that varying chocolate types may alter the sweetness and texture, so taste as you go. Consider pairing different chocolates with flavored fillings—like caramel or hazelnut spread—for a delightful twist!
What if I don’t have ganache?
No ganache? No problem! You can substitute it with glazed icing, peanut butter, or any nut spread you enjoy. You might also consider using jam or fruit preserves for a fruity complement to your Chocolate Thumbprint Cookies. This adds vibrant color and a burst of flavor! Exploring alternatives not only reduces waste but opens up endless possibilities. You can even try a combination of fillings for your next baking adventure!
For more creative ideas, check out this article on baking alternatives that enhance your cookies!
Conclusion on Chocolate Thumbprint Cookies
Final Thoughts on Making These Delightful Treats
Baking Chocolate Thumbprint Cookies is not just about whipping up a delicious treat; it’s also about creating joyful moments in your kitchen. This simple yet delightful recipe is perfect for anyone, whether you’re a baking novice or a seasoned pro. The combination of a rich chocolate base with a generous dollop of your favorite filling is sure to impress your friends and family.
As you savor these cookies, consider experimenting with different fillings, such as caramel or fruit preserves, to personalize your batch. For more tips and tricks, check out the resources provided by King Arthur Baking. Happy baking!
PrintChocolate Thumbprint Cookies: The Best Indulgent Treat for Your Sweet Tooth

Indulge in the rich and decadent flavors of Chocolate Thumbprint Cookies that are sure to satisfy your sweet tooth.
- Prep Time: 20 minutes
- Cook Time: 12 minutes
- Total Time: 32 minutes
- Yield: 24 cookies 1x
- Category: Dessert
- Method: Baking
- Cuisine: American
- Diet: Vegetarian
Ingredients
- 1 cup unsalted butter, softened
- 1 cup granulated sugar
- 2 cups all-purpose flour
- 1/2 cup unsweetened cocoa powder
- 1/2 teaspoon salt
- 1 teaspoon vanilla extract
- 1 cup chocolate ganache, for filling
Instructions
- Preheat your oven to 350°F (175°C).
- In a mixing bowl, beat the softened butter and sugar until creamy.
- Add in the vanilla extract.
- In another bowl, whisk together the flour, cocoa powder, and salt.
- Gradually blend the dry ingredients into the wet mixture until combined.
- Form small balls of dough and place them on a baking sheet.
- Use your thumb to create an indentation in the center of each cookie.
- Bake for 10-12 minutes.
- Remove from the oven and let cool.
- Fill each thumbprint with chocolate ganache.
Notes
- For extra flavor, add a pinch of espresso powder to the dough.
- Let the cookies cool completely before adding the ganache.
Nutrition
- Serving Size: 1 cookie
- Calories: 150
- Sugar: 12g
- Sodium: 50mg
- Fat: 8g
- Saturated Fat: 5g
- Unsaturated Fat: 3g
- Trans Fat: 0g
- Carbohydrates: 20g
- Fiber: 1g
- Protein: 2g
- Cholesterol: 30mg
Keywords: Chocolate Thumbprint Cookies, indulgent treats, dessert