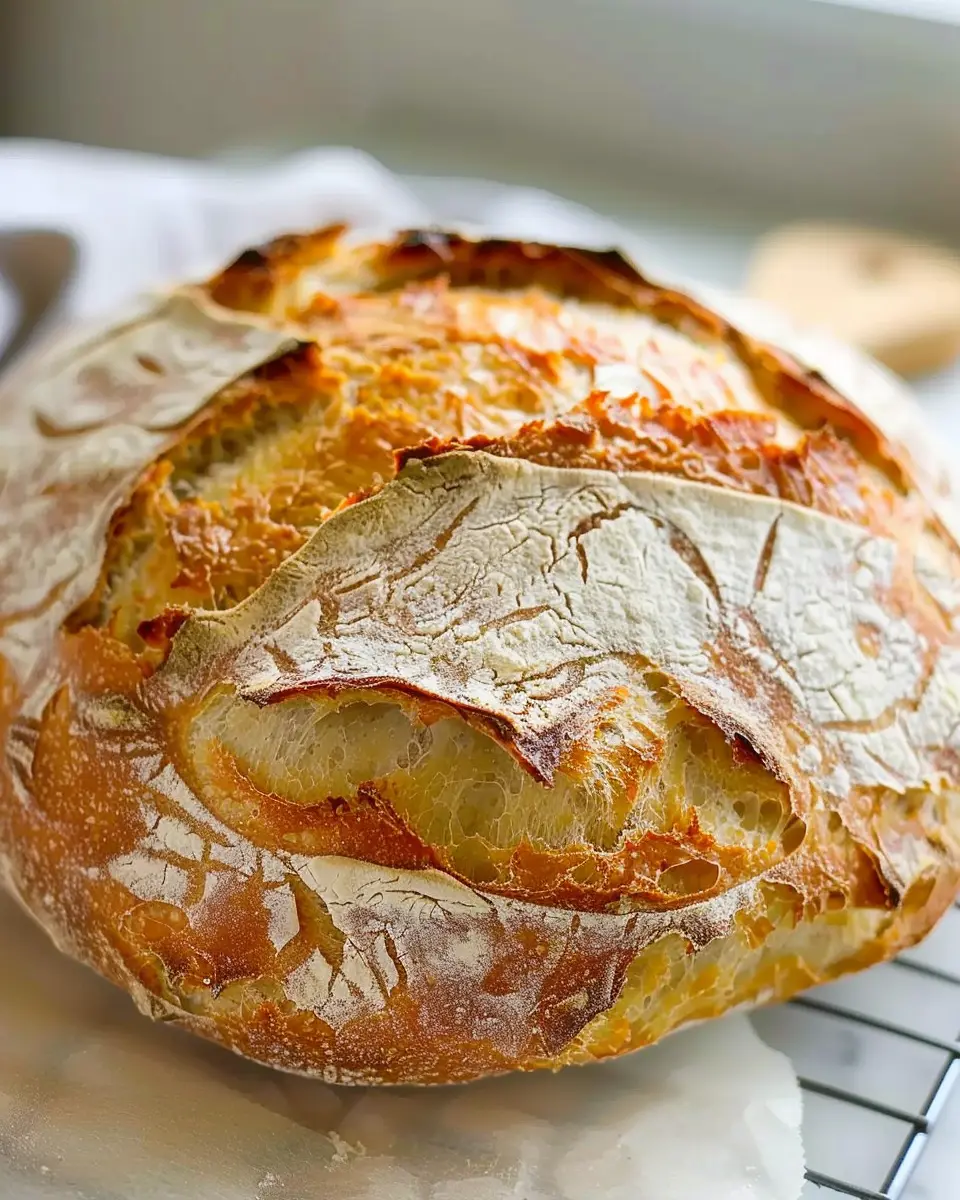
Introduction to Artisan Bread
Creating your own artisan bread at home is one of those simple joys that can elevate your cooking game while also providing a therapeutic experience. There’s something incredibly satisfying about mixing just a handful of ingredients—flour, water, yeast, and salt—into a beautiful loaf that not only looks impressive but tastes divine. But why take the plunge into home baking?
Why You Should Make Artisan Bread at Home
-
Unmatched Freshness: Store-bought bread often contains preservatives that can affect flavor and texture. When you make your own artisan bread, every bite is bursting with flavor, freshness, and well, love! Imagine slicing into a warm loaf, still steaming, as the aroma fills your kitchen.
-
Customization: One of the best things about making artisan bread is the ability to experiment. Want to add herbs? Go for it! Prefer whole grains? Mix them in! You can tailor your bread to suit your taste preferences or dietary needs. Great options for a healthy twist include whole wheat or spelt flour, or adding ingredients like seeds and nuts.
-
Cost-Effective: Despite its artisanal reputation, making your own bread can save you money. According to The Kitchn, a home-baked loaf costs significantly less than its store-bought counterpart, especially if you’re mindful about your ingredients.
-
Health Benefits: Home-baking allows you to control what goes into your loaf. You can avoid unnecessary additives and choose organic ingredients. Plus, you can reduce salt or adjust sugars to create a healthier version of your favorite bread.
-
Therapeutic Experience: Kneading dough is not just a physical act; it’s a mindful practice that can help reduce stress. As you work the dough, you’re engaging all your senses, focusing your thoughts, and creating something wonderful with your hands. It’s one of those meditative culinary practices that can do wonders for your mental well-being.
With so many reasons to start your baking journey, you’ll be thrilled to dive into our artisan bread recipe. Get ready to unleash your inner baker and bring that bakery feel to your kitchen!
Ingredients for Artisan Bread
Essential ingredients for the perfect loaf
Creating a delightful loaf of artisan bread is all about using high-quality ingredients. Here’s what you’ll need to whip up this amazing artisan bread recipe:
- Flour: Use bread flour for that lovely chewy texture, but you can also experiment with whole wheat or even rye for added flavor.
- Water: Opt for filtered water at room temperature. The right hydration level is crucial for developing gluten.
- Yeast: Instant yeast is the go-to choice for a reliable rise. If you’re feeling adventurous, you could also explore sourdough starters for a tangy twist.
- Salt: A must-have for enhancing flavor. Use sea salt or kosher salt for the best results.
The magic of artisan bread lies not just in the ingredients but also in your hands. Remember, this isn’t just about baking; enjoy the process! For more tips on the science of breadmaking, check out resources like King Arthur Baking.
Do you have a favorite ingredient that you think would elevate your artisan bread recipe? Share your thoughts below!
Preparing Artisan Bread
Creating your own artisan bread at home is an incredibly satisfying experience. Not only does it fill your kitchen with delightful aromas, but it also allows you to customize flavors and textures to your liking. Let’s dive into the steps you’ll need to take to prepare your own perfect loaf.
Gather your ingredients
Before you get your hands doughy, it’s essential to gather all your ingredients! A simple artisan bread recipe typically requires:
- 4 cups of all-purpose flour or bread flour
- 1.5 teaspoons of salt
- 1 packet (or 2 ¼ teaspoons) of instant yeast
- 1.5 cups of warm water (around 100°F, or just warm to the touch)
These basic ingredients are what give artisan bread its crusty exterior and chewy interior. You may also want to explore adding in herbs, cheese, or your favorite spices. This is your chance to be creative!
Mix the dry ingredients together
In a large mixing bowl, combine the flour, salt, and instant yeast. It’s essential to mix these dry ingredients thoroughly. Did you know that salt can inhibit yeast growth if added directly? To avoid this, ensure they’re well integrated before introducing any moisture.
Let’s take a moment to appreciate the magic of bread-making. Did you know that according to the US Department of Agriculture, yeast contributes to the gas that makes bread rise? This is why properly mixing the dry ingredients sets the foundation for a great loaf.
Combine with warm water
Once you’ve mixed your dry ingredients, it’s time to bring them to life. Gradually pour in the warm water while stirring with a wooden spoon or your hands. What you’re looking for is a shaggy, slightly sticky dough. Don’t worry if it seems too wet at first; it’ll come together during the rising phase.
If you are curious about bread-making techniques, the mixing and kneading phases can significantly influence the final result. Be sure to check reputable resources like the King Arthur Baking Company for insights.
Let the dough rise
Now comes the hardest part: waiting. Cover the bowl with a damp kitchen towel or plastic wrap and set it in a warm place to rise for about 1–2 hours, or until it doubles in size. Some bakers swear by leaving the dough to rise overnight in the refrigerator for even better flavor development.
During this time, you could prep a delicious vegetable soup or maybe some olive oil and vinegar for an Italian-styled dip to enjoy with your freshly baked bread. Feel free to explore some recipes on New York Times Cooking to pair with your artisan masterpiece!
Shape the loaf
Once your dough has risen beautifully, it’s time to get hands-on. Flour your work surface lightly and gently transfer the dough onto it without deflating it too much. Shape it into a round or oval loaf by folding the edges towards the center before flipping it over and using a bit of flour to create surface tension by gently pulling the dough towards you.
Don’t stress if your shaping technique isn’t perfect—it’s all about practice. Each loaf has its personality, and sometimes those little imperfections can add to its artisan character.
Bake the bread
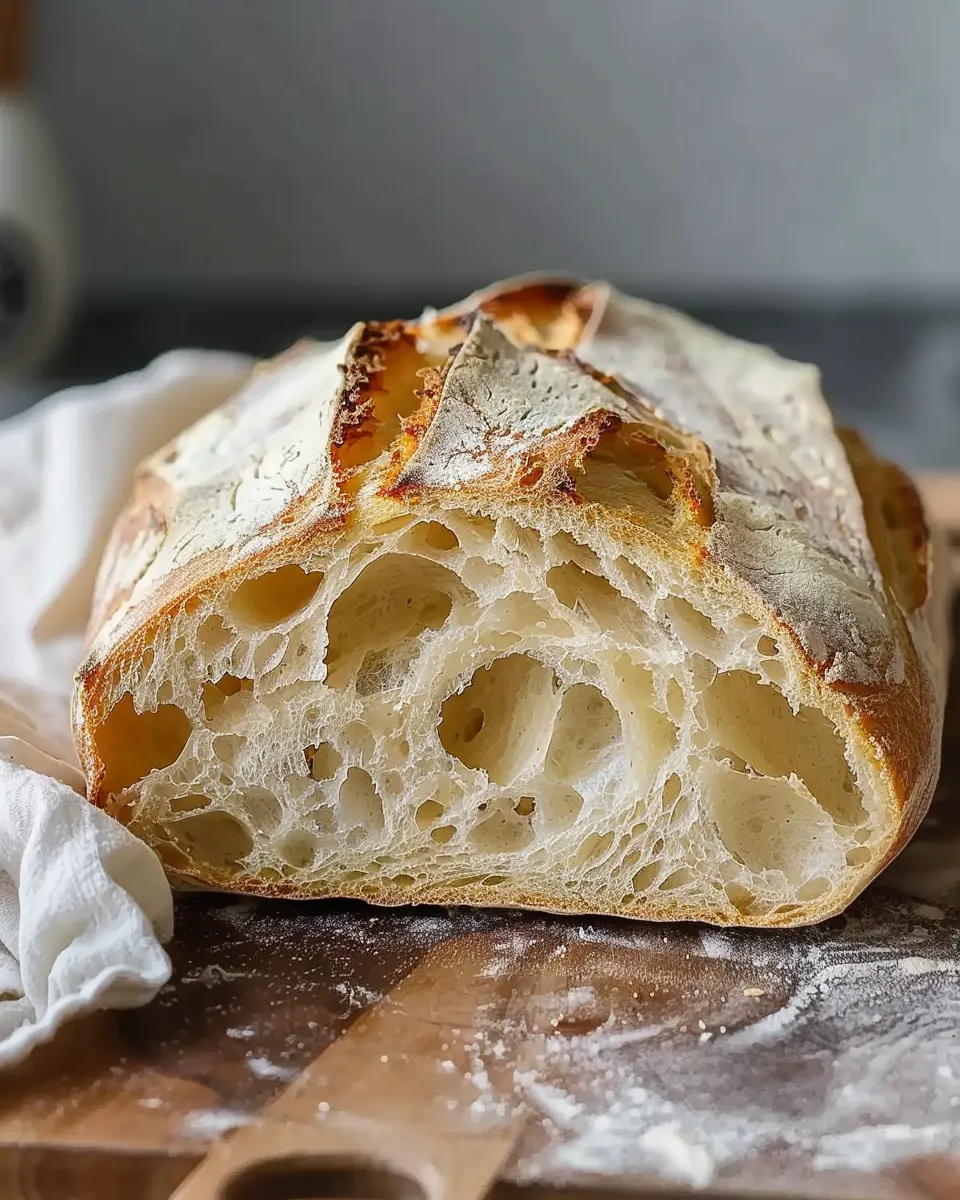
Your final step is to bake this beauty! Preheat your oven to 450°F (232°C) and place a Dutch oven or pizza stone inside to heat up. Once preheated, carefully place your dough inside a parchment paper-lined baking pot, cover it, and bake for about 30 minutes. Then, remove the lid and bake for an additional 15–20 minutes until the crust is a glorious golden brown.
Allow the loaf to cool on a wire rack before slicing. There’s nothing quite like the first bite of a warm, crusty loaf of bread—the texture, the aroma—it all comes together! Enjoy this simple, homemade artisan bread recipe and feel free to share it with friends and family. Happy baking!
Variations on Artisan Bread
Creating your own artisan bread is a delightful journey, and one of the best aspects is the opportunity to personalize your loaf. Here are some delicious ways to make this artisan bread recipe uniquely yours.
Adding Herbs and Spices
Imagine the aroma of fresh bread wafting through your kitchen, enhanced by the warm notes of rosemary or savory thyme. Incorporating herbs and spices can elevate your bread from simple to sensational. Consider mixing in:
- Fresh rosemary or oregano for a Mediterranean twist
- Crushed garlic for a savory flavor
- A dash of cinnamon and nutmeg for a subtle sweetness in breakfast breads
Experimenting with different combinations can turn an ordinary loaf into the star of your brunch table!
Incorporating Seeds and Nuts
For those of us who crave a little crunch, adding seeds and nuts is a game-changer. Not only do they provide texture, but they also offer health benefits. Try these options:
- Sunflower seeds or pumpkin seeds for an earthy crunch
- Chopped walnuts or pecans for richness
- A sprinkle of sesame seeds to create an appealing crust
You can easily toast and incorporate these ingredients into your artisan bread recipe to maximize flavor and depth.
Experimenting with Different Flours
Why limit yourself to all-purpose flour? Experimenting with various flours can completely change the profile of your artisan bread. Here are some ideas:
- Whole wheat flour adds a nutty flavor and extra nutritional benefits.
- Rye flour can bring in a unique density and flavor, ideal for hearty sandwiches.
- Gluten-free alternatives like almond flour or chickpea flour offer options for those with dietary restrictions.
Do your taste buds a favor—explore and experiment! For more flour types and their effects on baking, check out resources like King Arthur Baking. Your artisan bread will surely leave those who try it craving more!
Cooking Tips and Notes for Artisan Bread
Perfecting the crust
Achieving the ultimate crust on your artisan bread is crucial for that bakery-style finish. One effective method is to use a Dutch oven for baking; it traps steam, resulting in a crispy exterior. Additionally, keep your oven preheated to the right temperature—around 450°F (232°C) is ideal. Spritzing water into the oven just before baking can also help create that perfect crunch.
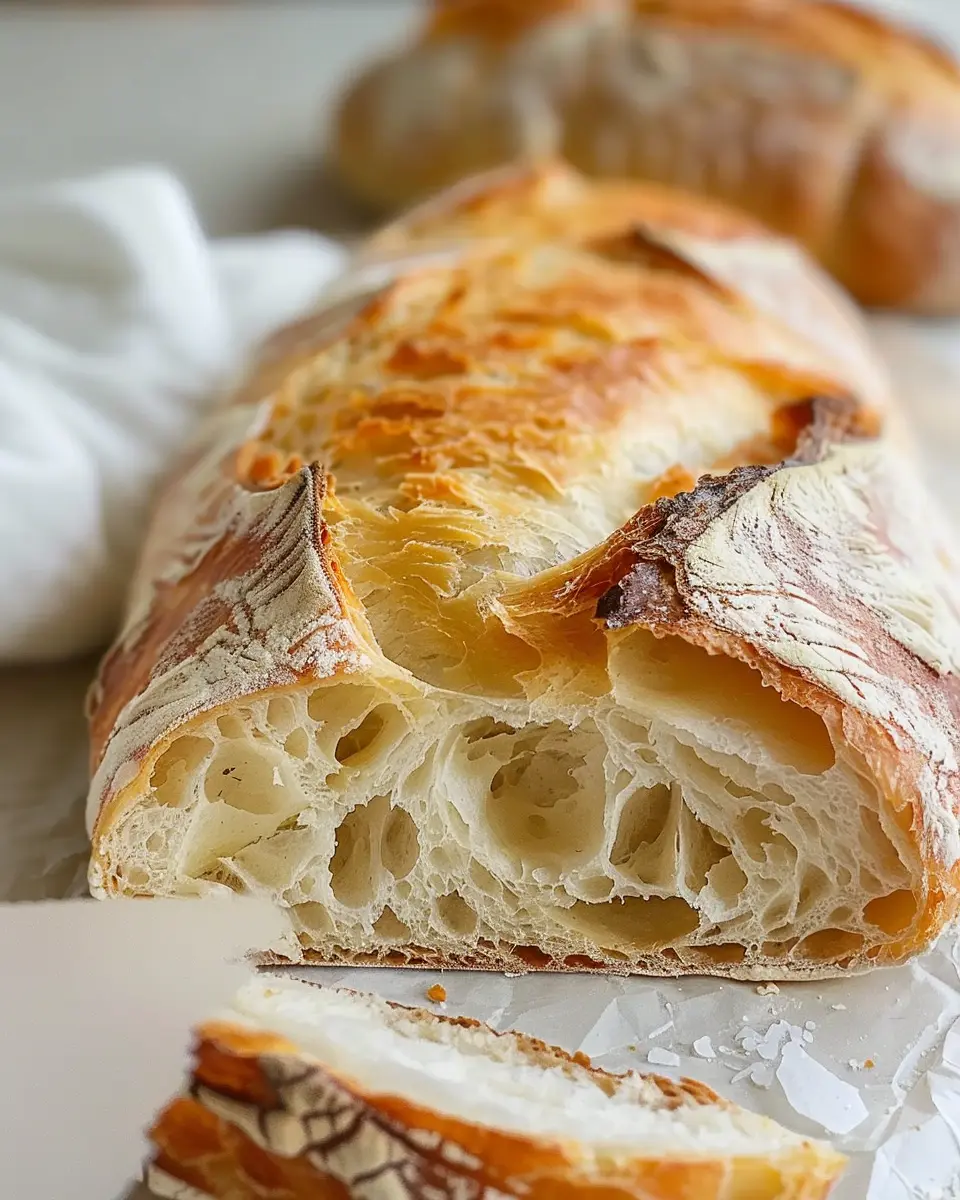
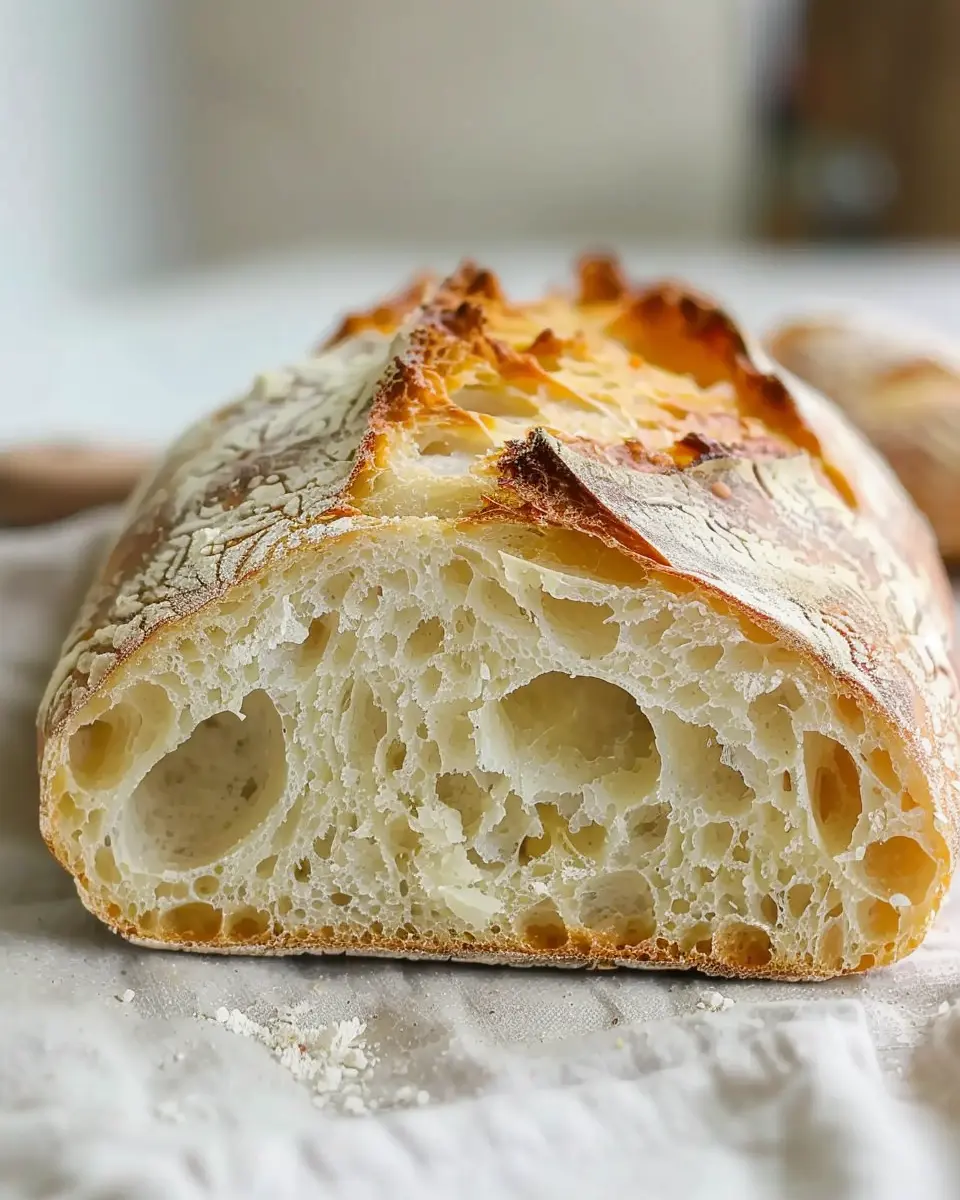
How to achieve the ideal crumb
The crumb refers to the texture within your bread. To achieve a light and airy structure, ensure you’re using a high-protein flour, like bread flour, which offers more gluten. It’s important to allow for proper fermentation—let the dough rise longer to develop flavor and strength. For more tips, check out this guide on working with sourdough.
Storing artisan bread effectively
Once baked, store your artisan bread by wrapping it in a kitchen towel, then placing it in a paper bag—this keeps the crust crispy while maintaining a soft interior. If you want to store it for longer, consider freezing it. Wrap it tightly in plastic wrap and place it in an airtight bag; it can last several months without losing quality.
By following these tips, you’ll elevate your artisan bread recipe and impress everyone with your newfound baking skills!
Serving Suggestions for Artisan Bread
Artisan bread can be a delightful centerpiece to many meals. Let’s explore some creative ways to enjoy your freshly baked loaf.
Pairing with Soups and Salads
Imagine dipping a warm slice of artisan bread into a rich, comforting soup—it’s as if the two were destined to be together! Whether you’re savoring a hearty minestrone or a light tomato basil, the crusty exterior of artisan bread complements the smooth textures beautifully. Pairing it with a crisp salad? That’s a classic! Try it with a Caesar or a simple spinach salad for a satisfying meal.
Using It for Sandwiches
Sandwich lovers, rejoice! Artisan bread makes an excellent foundation for both classic and innovative sandwiches. Think of turkey bacon with fresh greens or chicken ham layered with tangy mustard. You can even craft a gourmet grilled cheese! Swap your usual bread for artisan, and taste the difference in quality.
Enjoying It as Part of a Cheese Platter
Elevate your next charcuterie board by incorporating slices of artisan bread. Its unique texture pairs beautifully with an array of cheeses—from creamy brie to sharp cheddar. Add fruits and nuts for a well-rounded experience, perfect for gatherings or a cozy night in.
For more tips on creating the perfect cheese platter, consider checking out websites like Cheese & Wine. There are endless possibilities. Enjoy your baking adventure!
Time Breakdown for Artisan Bread
When embarking on your artisan bread recipe, it’s helpful to understand the timings involved. Knowing how to allocate your time ensures a smooth baking experience and delicious results!
Preparation Time
Expect about 20-30 minutes for mixing and kneading your dough. This step is where the magic of flavor and texture begins.
Rising Time
The bulk fermentation process takes approximately 4-12 hours. This might seem long, but it’s crucial for developing that rich, savory flavor we love in artisan breads. A long rise allows the yeast to work its wonders! For the best results, try overnight fermentation.
Baking Time
Once your dough has risen beautifully, you’ll need about 30-35 minutes in the oven. Keep an eye on that crust—it should be golden and crispy!
Total Time
In total, from start to finish, you’re looking at around 4-13 hours. While it may require patience, the aroma of freshly baked bread wafting through your home is truly worth it. Happy baking!
For more tips on perfecting your bread, check out King Arthur Flour for expert advice and techniques.
Nutritional Facts for Artisan Bread
Calories per slice
When savoring a slice of your homemade artisan bread, you can expect to consume roughly 80-100 calories, depending on the recipe and ingredients used. This makes it a relatively light option for a multitude of meals throughout the day.
Nutritional benefits
Beyond its delightful taste and texture, artisan bread offers several nutritional benefits, making it a worthy choice for conscious eaters:
- Whole Grain Goodness: Many artisan recipes utilize whole grain flour, which is rich in fiber and essential nutrients. Consuming whole grains can improve digestion and sustain energy levels.
- Protein Power: With ingredients like flour and seeds, artisan bread packs a protein punch that supports muscle health and recovery.
- Versatile Pairing: The hearty nature of artisan bread complements various toppings, from avocado to turkey bacon, enhancing your nutrient intake.
Curious to dive deeper into the health benefits of bread? Check out resources from the Whole Grains Council for insights! Embrace the joy of baking and appreciate how this artisan bread recipe can be a wholesome staple in your diet.
FAQs about Artisan Bread
What’s the secret to crusty artisan bread?
The secret to that deliciously crusty exterior lies in steam! When baking your artisan bread recipe, create steam in the oven by placing a tray of hot water on the bottom rack or spritzing water onto the bread before baking. This moisture allows the crust to develop while keeping the inside soft and airy. You might also find that using a Dutch oven helps, as it traps steam effectively—leading to a perfectly baked loaf.
Can I make artisan bread without a baking stone?
Absolutely! Although a baking stone can enhance heat retention and create a lovely crust, it’s not a deal-breaker for a beautiful artisan loaf. If you don’t have one, simply use a heavy-duty baking sheet turned upside down. Preheating it ensures a hot surface for your dough, helping achieve that artisan touch. Want to explore more tips on baking surfaces? Check out resources from King Arthur Baking.
How do I know when my bread is done?
Knowing that your artisan bread is done baking can be a bit tricky. Here are a few tips:
- Color: Look for a deep golden-brown crust.
- Tap Test: Gently tap the bottom of the loaf; it should sound hollow.
- Internal Temperature: If you have a kitchen thermometer, the internal temperature should reach about 190°F to 205°F.
Trust your instincts! Baking is as much art as it is science, and with practice, you’ll get a feel for it. Don’t forget to enjoy the process, and make your kitchen the heart of creativity and deliciousness.
Conclusion on Artisan Bread
Embracing the Joy of Homemade Bread
Creating your own artisan bread is more than just a cooking project; it’s a delightful adventure. Each loaf tells a story as you mix, knead, and bake, inviting the aromas of freshly baked bread into your home. The satisfaction of pulling a warm, crusty loaf from the oven is unrivaled. With this artisan bread recipe, you not only nourish your body but also kindle a love for baking.
As you experiment with flavors and techniques, consider trying variations like adding herbs or different types of flour. Remember, the joy lies in the journey, so embrace each baking experience. Happy baking! For additional tips and resources, check out expert advice on sourdough from King Arthur Baking or explore unique flavor pairings at Food52.
PrintArtisan Bread Recipe: The Best Easy Loaf for Homemade Joy
This artisan bread recipe is perfect for creating a delicious loaf at home with minimal effort.
- Prep Time: 15 minutes
- Cook Time: 45 minutes
- Total Time: 18 hours
- Yield: 1 loaf 1x
- Category: Bread
- Method: Baking
- Cuisine: American
- Diet: Vegetarian
Ingredients
- 4 cups all-purpose flour
- 1.5 teaspoons salt
- 1 teaspoon instant yeast
- 1.5 cups warm water
Instructions
- In a large bowl, mix the flour, salt, and yeast.
- Add warm water and stir until a sticky dough forms.
- Cover the bowl with plastic wrap and let it rise for 12 to 18 hours.
- Preheat the oven to 450°F (230°C).
- Lightly flour a work surface and turn the dough out onto it.
- Shape the dough into a ball and let it rest for 30 minutes.
- Transfer the dough to a preheated Dutch oven and cover.
- Bake for 30 minutes, then remove the lid and bake for an additional 15 minutes.
- Let cool before slicing.
Notes
- To add flavor, consider incorporating herbs or cheeses.
- Use parchment paper for easy lifting of the dough.
Nutrition
- Serving Size: 1 slice
- Calories: 150
- Sugar: 0.5g
- Sodium: 300mg
- Fat: 0.5g
- Saturated Fat: 0g
- Unsaturated Fat: 0g
- Trans Fat: 0g
- Carbohydrates: 30g
- Fiber: 1g
- Protein: 5g
- Cholesterol: 0mg
Keywords: Artisan Bread Recipe, Homemade Bread, Easy Bread Recipe