Introduction to Garlic Herb Braided Bread
Baking your own bread is an experience that connects you to your kitchen and fills your home with delightful aromas. But have you tried making Garlic Herb Braided Bread? If you haven’t, you’re in for a treat. This recipe is not only visually stunning but also packed with flavor, making it the perfect companion for soups, salads, or even a delightful appetizer. Picture this: you pull a loaf out of the oven, the golden crust glistening, and the scent of garlic and fresh herbs wafting through the air. It’s pure bliss!
Why Bake Garlic Herb Braided Bread?
There are 7 flavorful reasons to whip up this amazing loaf that go beyond its mouthwatering taste. First, the act of braiding the dough not only enhances its aesthetic appeal but also gives you a unique sense of accomplishment. Dive into the world of bread-making with this recipe that’s approachable, even for beginners. Thanks to the simple ingredients like flour, yeast, garlic, and mixed herbs, you can create something truly special with minimal effort.
The versatility of Garlic Herb Braided Bread is another reason to get baking. Whether you’re serving it alongside a hearty bowl of tomato soup or using it to mop up a flavorful stew, this bread adapts seamlessly. You can even customize the herbs to suit your palate. Try mixing in rosemary, thyme, or even some zesty rosemary for a kick!
Moreover, baking this bread is an excellent way to impress your guests. Pulling it apart at the dinner table adds a shared experience, bringing everyone together over a warm, homemade creation. Not many store-bought options can rival that.
Did you know that freshly baked bread can elevate your meals and mood? According to studies, the aroma of baking bread can evoke feelings of warmth and nostalgia (source: Psychology Today). So why not harness those feelings while enjoying a delicious slice of Garlic Herb Braided Bread?
In the sections to follow, we’ll delve into step-by-step instructions and helpful tips to ensure your bread turns out perfectly. Get ready to bake and discover just how fulfilling it can be to create this stunning loaf at home.

Ingredients for Garlic Herb Braided Bread
Creating an unforgettable Garlic Herb Braided Bread starts with the right ingredients. Gather these flavorful components to prepare a delightful loaf that will have friends and family singing your praises.
Core Ingredients You’ll Need
- All-purpose flour: About 3 to 4 cups to form the base of your dough. Opt for unbleached for a better texture.
- Yeast: 2 tablespoons of active dry yeast to help your bread rise beautifully.
- Warm water: 1 cup (around 110°F) to activate the yeast—don’t go overboard; if it’s too hot, it could kill the yeast!
- Sugar: 2 tablespoons to add a hint of sweetness and help with fermentation.
- Salt: 1.5 teaspoons to enhance the flavors; don’t skip this step!
- Olive oil: 3 tablespoons for richness and moisture.
- Garlic: 3 cloves, minced for that aromatic kick.
- Fresh herbs: A mix of parsley, rosemary, and thyme—about 1/4 cup total for a vibrant taste.
With these ingredients on hand, you’re ready to embark on a baking adventure. Curious about more reasons to whip up this stunning loaf? Keep reading to discover 7 flavorful reasons that will inspire your next baking session! For more tips on ingredient quality, check out this resource from King Arthur Baking.
Preparing Garlic Herb Braided Bread
Baking Garlic Herb Braided Bread is not just about creating something delicious; it’s about the entire experience of mixing, kneading, and, most importantly, the anticipation that builds as the aroma fills your kitchen. In this section, we’ll walk through each step carefully, ensuring you feel confident and excited to make this stunning bread.
Activate the yeast
First things first, let’s wake up our yeast! For this recipe, you’ll want to use either active dry yeast or instant yeast—both will work, but if you’re using active dry yeast, you’ll need to activate it. Start by combining:
- 1 cup of warm water (around 110°F)
- 1 tablespoon of sugar
- 2 ¼ teaspoons of yeast
Let this mixture sit for about 5-10 minutes until it becomes frothy. This step is crucial because it ensures that your yeast is alive and ready to work its magic in your bread. If you’re curious about the science behind yeast, check out King Arthur Baking’s yeast guide. It’s a handy resource for bakers of all levels!
Mix the wet and dry ingredients
Once your yeast is activated, it’s time to mix things up! In a large mixing bowl, add the frothy yeast mixture to:
- 3 cups of all-purpose flour
- 1 tablespoon of salt
- 2 tablespoons of olive oil
- 4 cloves of minced garlic
- 2 teaspoons dried Italian herbs (like oregano or thyme)
Stir until a dough forms; it should be a little sticky. This part is where the flavor truly begins to develop—think about the delectable hints of garlic and herbs melded into the dough!
Knead the dough
Now comes the fun part: kneading! Turn your dough onto a floured surface and knead for about 8-10 minutes. The goal here is to develop the gluten, which gives the bread structure. Don’t rush this part; really get into the kneading process! You can even put on some music and enjoy the rhythmic motion of working with your hands.
Tips for successful kneading:
- If the dough is too sticky, sprinkle a little extra flour.
- Your dough should become smooth and elastic as you work.
First rise
Once your dough is nicely kneaded, shape it into a ball and place it in a greased bowl. Cover it with a clean kitchen towel or plastic wrap, and let it rise for about an hour or until it’s doubled in size. This step is crucial as it allows the yeast to do its thing.
Shape the dough into braids
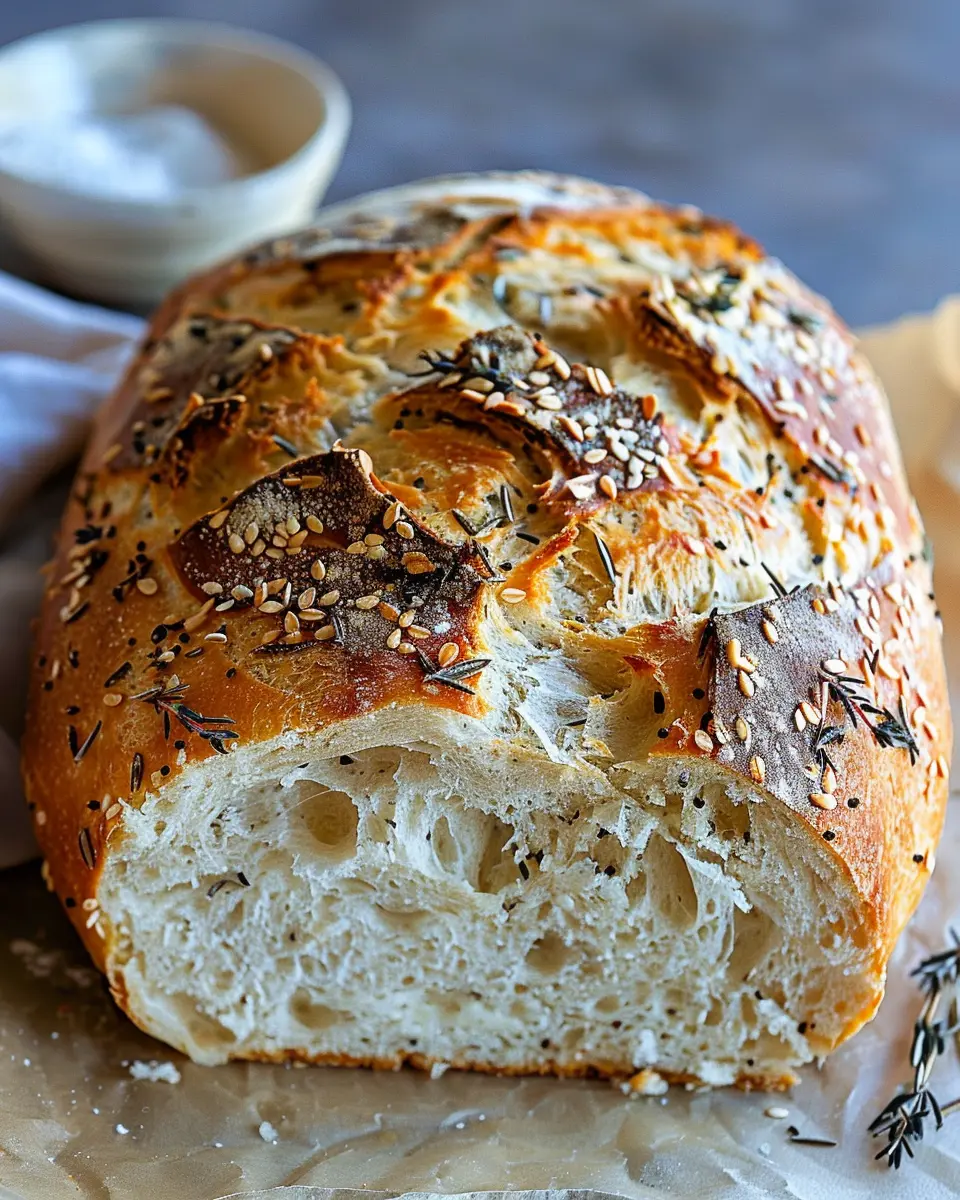
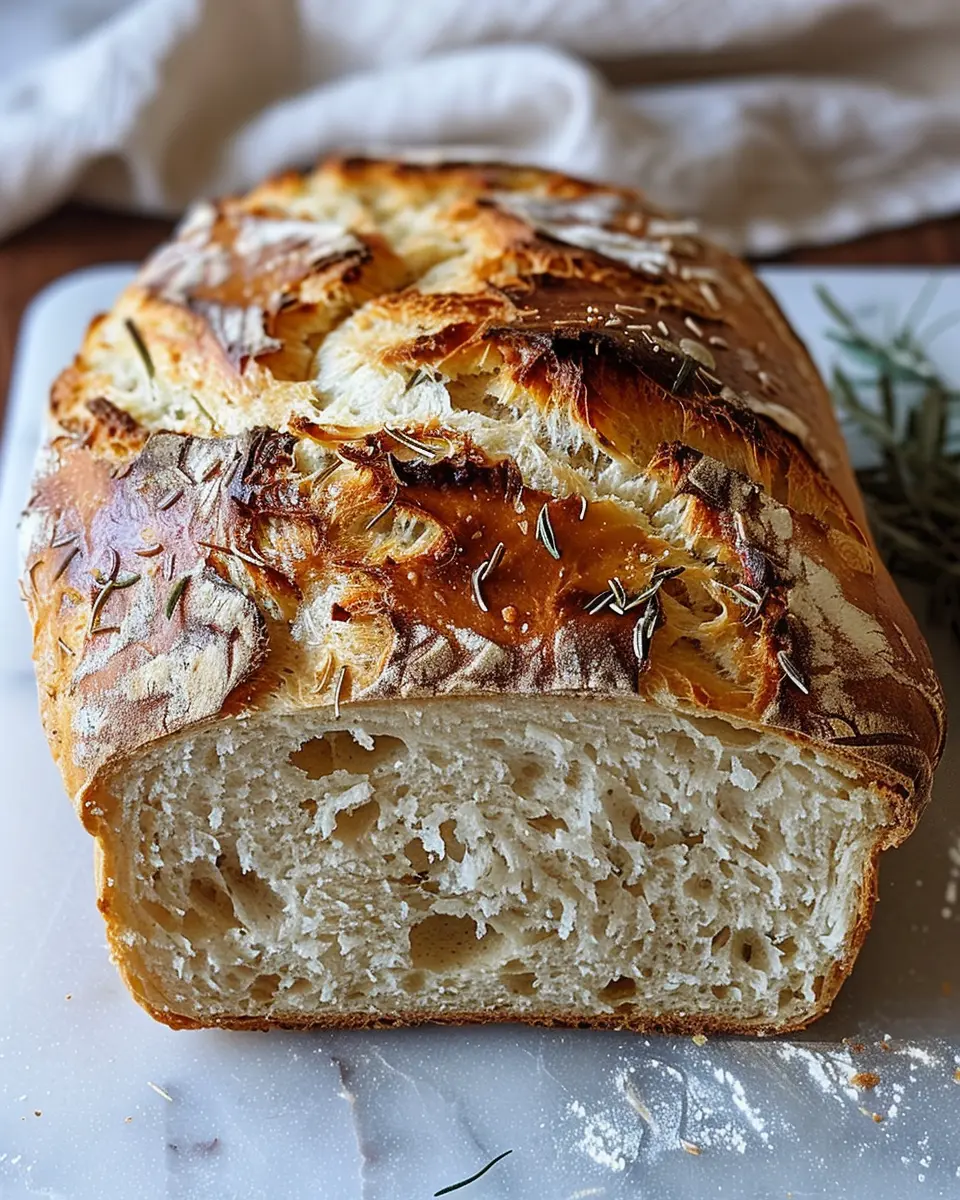
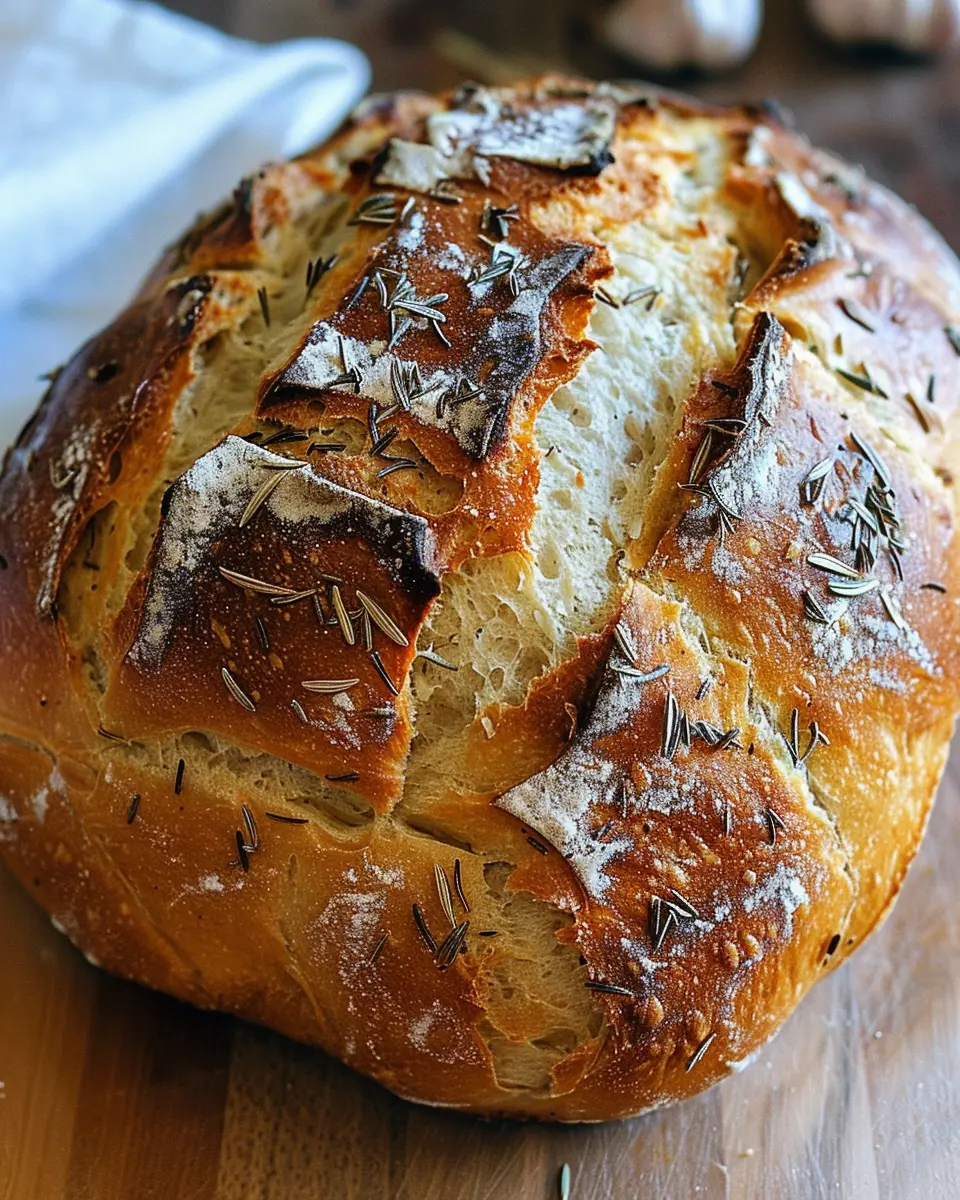
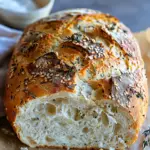
After your dough has risen beautifully, punch it down to release the air. Divide it into three equal pieces and roll each piece into a long rope—usually about 12-14 inches. Then, braid these ropes together, pinching the ends to seal them. This braided shape is not just visually appealing but also allows for a perfect ratio of crust to soft interior.
Second rise
Place your braided dough onto a parchment-lined baking sheet and let it rise again for about 30 minutes. Cover it gently with a towel as it puffs up, giving it the perfect volume. This is a good time to prepare your oven by preheating it to 375°F.
Bake to golden perfection
Everything is in place now! Brush the braided loaf with an egg wash, which consists of an egg beaten with a tablespoon of water. This step creates that gorgeous, shiny crust we all love. Bake the bread for 25-30 minutes, or until it turns a beautiful golden brown. You’ll know it’s done when it sounds hollow when tapped on the bottom.
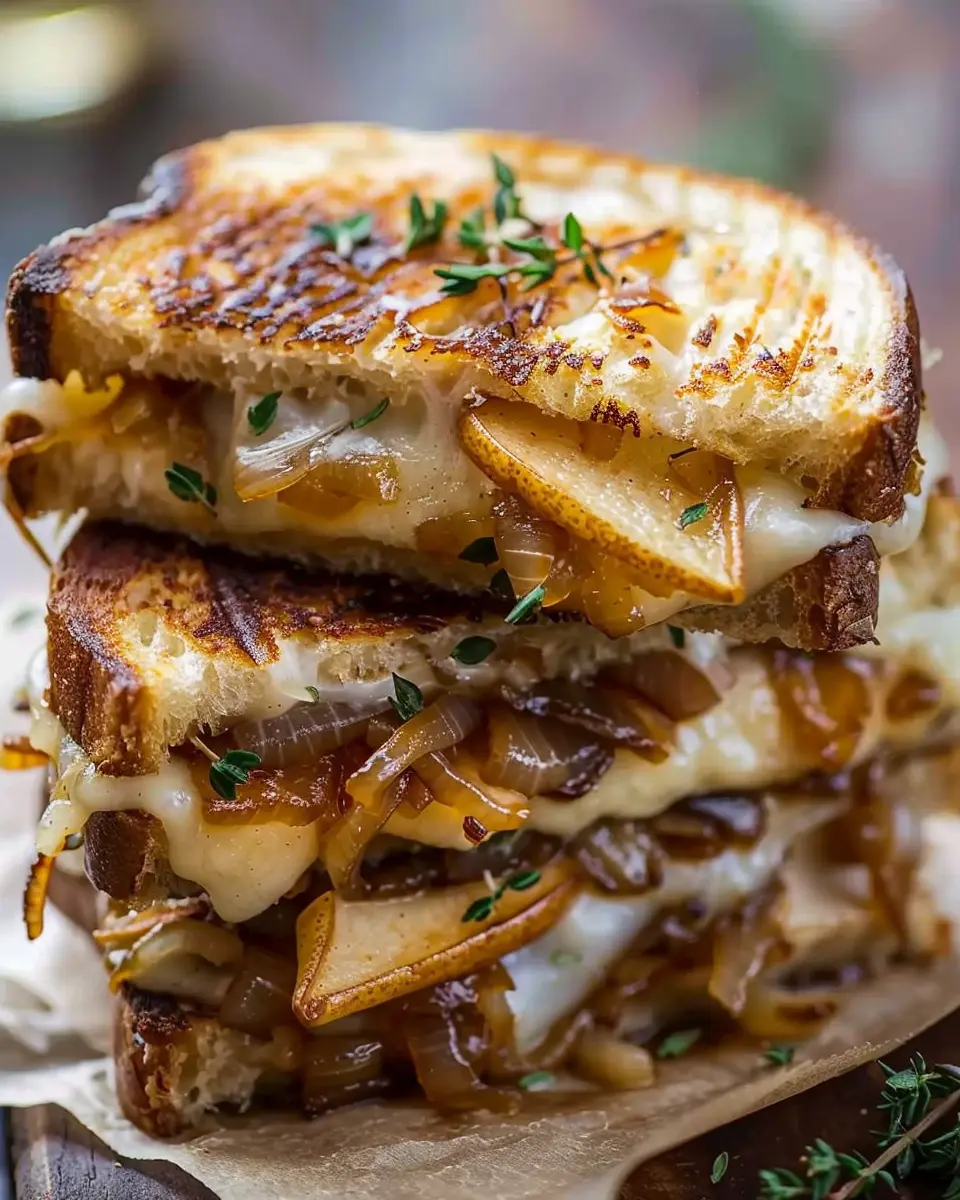
And there you have it, a stunning Garlic Herb Braided Bread ready to be enjoyed! Whether you serve it warm with some butter or as an accompaniment to your favorite turkey bacon and chicken ham sandwich, this loaf promises to impress and satisfy. So go ahead, and embrace the whimsical world of baking—it’s truly one of the 7 flavorful reasons to whip this bread up today!
Variations on Garlic Herb Braided Bread
If you’re ready to take your Garlic Herb Braided Bread to the next level, consider these delightful variations that promise to impress and satisfy. After all, who could resist a loaf that’s as versatile as it is beautiful?
Add Different Herbs and Spices
While garlic and herbs are the star players, feel free to experiment! Try adding:
- Rosemary for a piney, aromatic touch.
- Thyme for a sweet-woodsy flavor.
- Oregano to give it an Italian twist.
Not only do these herbs enhance the flavor, but they also offer their own health benefits, such as antioxidant properties.
But why stop there? A pinch of crushed red pepper flakes can add a nice kick, while smoked paprika can deliver a gently smoky depth. You could even explore global flavors by incorporating spices like cumin or coriander for an unexpected twist.
Incorporate Different Cheeses
Can you think of anything more enticing than cheese woven into your bread? Try adding:
- Parmesan for a salty, nutty flavor that bakes beautifully.
- Mozzarella for a gooey, stretchy texture that’s simply irresistible.
- Feta for a tangy contrast.
Mixing cheeses can elevate your loaf to new heights! Combine the sharpness of aged cheddar with the creaminess of goat cheese for a rich filling. If you’re feeling adventurous, consider adding a layer of spinach and turkey bacon for a delightful twist reminiscent of classic savory pastries.
These variations cater to any palate, making it easy to discover your own favorite blend. So, get creative and embrace the chance to craft your own version of this stunning loaf; after all, there are 7 flavorful reasons to bake this today!
Baking and Preparation Notes for Garlic Herb Braided Bread
Baking your own Garlic Herb Braided Bread may seem daunting at first, but trust me, it’s a rewarding experience that fills your kitchen with an irresistible aroma. Here are some handy tips to ensure your loaf turns out beautifully every time.
Read the Recipe Thoroughly
Before diving in, give the recipe a thorough read-through. Familiarizing yourself with key steps can save you time and avoid any surprises.
Ingredients Matter
Using fresh herbs and high-quality garlic will elevate your bread’s flavor. Don’t skimp—try ingredients from local markets (support small businesses!) for the best results. Need fresh herbs? Check out this guide on choosing the best options from Healthline.
Knead with Love
When combining the ingredients, knead the dough until it’s smooth and elastic. This builds the gluten, making your bread fluffy. Aim for around 8-10 minutes of kneading; your arms will thank you later!
Perfect the Braiding Technique
Braiding might feel tricky, but practice leads to perfection! Use three evenly sized ropes and pinch them at the top, then alternate crossings down to the end. It’s okay to make mistakes.
Baking and Cooling
Keep an eye on your oven! Each one is unique, so a visual cue is essential—aim for that golden-brown crust. Once baked, let the loaf cool on a rack to maintain its texture.
These simple notes will help you whip up this stunning loaf with confidence. For 7 flavorful reasons to bake today, keep reading the full article!
Serving Suggestions for Garlic Herb Braided Bread
Garlic Herb Braided Bread is not just a feast for the eyes; it’s incredibly versatile too! Here are some delightful serving suggestions that take this stunning loaf to the next level.
Perfect Pairings at the Table
-
Dips and Spreads: Serve warm with a side of creamy hummus or a tangy artichoke dip. These pairings bring out the incredible flavors of the garlic and herbs.
-
Soups and Salads: This braided bread is fantastic alongside a steaming bowl of tomato basil soup or a crisp Caesar salad. The bread makes a perfect vessel for soaking up every drop of flavor!
-
Savory Sandwiches: Think beyond the usual! Layer slices with turkey bacon, chicken ham, or even roasted veggies for a deliciously satisfying sandwich.
-
Entertaining Extraordinaire: Hosting friends? Cut the bread into bite-sized pieces for a simple yet elegant appetizer, perfect for dipping or stacking with charcuterie.
Adding this Garlic Herb Braided Bread to your table truly encapsulates 7 flavorful reasons to indulge in homemade delights. It’s not just food; it’s an experience! Explore more serving ideas on food blogs like Serious Eats or other culinary websites for more inspiration.
Tips for Baking the Perfect Garlic Herb Braided Bread
Baking Garlic Herb Braided Bread is an art, and I’m here to share some essential tips to ensure your loaf is a showstopper at the dinner table! Whether you’re a seasoned baker or just starting, follow these hints for a perfect outcome.
Choose the Right Ingredients
Quality matters! Opt for fresh herbs like rosemary or thyme and use organic garlic for an intense flavor punch. Don’t skimp on the butter either; it brings richness to the bread. If you’re interested in alternative flavor profiles, check out this guide on bread making.
Knead Like You Mean It
Kneading is crucial in developing gluten, which gives your bread that delightful chewiness. Aim for about 10–15 minutes of kneading—you’ll know it’s ready when the dough is smooth and elastic. Not sure if you’re kneading enough? A great test is the “windowpane” method; stretch a piece of dough between your fingers to see if it holds shape.
Let it Rise
Patience is key! Allow your dough to rise until it doubles in size. This step is vital for achieving that lighter texture. Pro tip: place your dough in a warm, draft-free area. I often turn on my oven for a few minutes, then switch it off and let the dough rise inside.
Master the Braid
Braiding might seem tricky, but it’s part of the fun! Start by dividing your dough into three equal strands. Then, cross them over one another—think of it as a dance! You can watch this tutorial on braiding bread for visual guidance. Remember, keeping your strands even helps ensure an attractive final product.
Bake with Confidence
Make sure to preheat your oven to the right temperature (usually around 375°F). This ensures your bread bakes evenly with that golden-brown crust. A tip I swear by is to place a small dish of water in the oven during the first few minutes; this creates steam, resulting in a delightful crust.
With these tips, you’ll be well on your way to creating a stunning loaf of Garlic Herb Braided Bread that impresses everyone around the table. Enjoy the process and the delicious aroma that fills your kitchen!
Time details for Garlic Herb Braided Bread
Preparation time
Getting your hands into the dough feels almost therapeutic! This Garlic Herb Braided Bread requires about 20-30 minutes for prep. You’ll mix, knead, and let that lovely dough rise, so set aside a little time to enjoy the process.
Cooking time
Once your dough has risen and is beautifully braided, it’ll need around 30-35 minutes in the oven to turn golden brown and develop that irresistible crust. Make sure to keep a close eye as it approaches the finish!
Total time
When you factor in all the prep and cooking, expect this stunning loaf to take about 1 hour and 10 minutes to 1 hour and 30 minutes from start to finish. Perfect for a weekend baking session or when you want to impress guests with a warm, homemade delight. Want to explore more flavorful ideas? Check out King Arthur Baking for tips and tricks!
With its garlicky aroma wafting through your kitchen, this bread is definitely worth every minute of your time!
Nutritional information for Garlic Herb Braided Bread
When you decide to whip up this Garlic Herb Braided Bread, it’s essential to keep in mind what you’re adding to your meal. Here’s a quick breakdown of its nutritional content per serving:
Calories
A single slice of this gorgeous bread contains approximately 150 calories. When paired with your favorite spreads or toppings, this flavorful addition won’t break the calorie bank. Perfect for a cozy night in!
Protein
Each slice brings about 4 grams of protein to your table. While it’s not a protein powerhouse, it does complement heartier meals, perhaps even featuring alongside a plate of Turkey Bacon or a savory Chicken Ham salad.
Sodium
With around 250 milligrams of sodium per slice, this bread strikes a decent balance. It’s always good to be mindful of your sodium intake, especially when enjoying delicious accompaniments. Pairing it with fresh herbs or low-sodium dips can keep things light and healthy.
Baking this stunning loaf not only fills your kitchen with an irresistible aroma but also adds a touch of elegance to any meal. For more delightful ideas, check out these garlic health benefits or discover how herbs can elevate your dishes here. Enjoy your baking journey!
FAQs about Garlic Herb Braided Bread
Can I make this bread gluten-free?
Absolutely! If you’re looking to enjoy Garlic Herb Braided Bread without gluten, you can easily substitute traditional all-purpose flour with a gluten-free blend. Make sure to choose a blend that includes xanthan gum, which helps replicate the elasticity and texture of gluten. This option opens the door for everyone to enjoy the fluffy delights of this stunning loaf — a perfect way to impress guests with dietary restrictions.
How do I store leftover bread?
To keep your Garlic Herb Braided Bread fresh, store it in an airtight container or wrap it tightly in plastic wrap. At room temperature, it’ll stay good for up to 3 days. If you want to extend its life, consider freezing it. Just slice the bread before freezing so you can easily grab a piece whenever you’re craving a delicious bite! To reheat, simply pop it in the oven for a few minutes at 350°F (175°C) for that fresh-baked feeling.
What can I serve with Garlic Herb Braided Bread?
The flavors in Garlic Herb Braided Bread are versatile, making it a fabulous addition to various meals. Here are some serving suggestions:
- Pair it with soup for a comforting combo, especially a rich tomato or roasted vegetable soup.
- Use it to make delicious sandwiches with turkey bacon or chicken ham.
- Serve it as a side to your favorite pasta dishes or stir-fries.
- Add a dish of olive oil and balsamic vinegar for dipping, elevating the flavor experience with every bite.
What’s not to love about a bread that enhances every meal? So, why not find 7 flavorful reasons to bake this loaf today? You’ll be glad you did!
Conclusion on Garlic Herb Braided Bread
In wrapping up our exploration of this Garlic Herb Braided Bread, you might be wondering why it’s worth your time. The answer lies in the 7 flavorful reasons to bake this stunning loaf, which not only elevates any meal but also offers a delightful kitchen experience. Imagine the warm aroma wafting through your home and the joy of sharing this exquisite bread with friends and family. Why settle for store-bought when you can create something truly special and personal? So, if you’re ready to impress and savor every slice, it’s time to roll up your sleeves and dive into this baking adventure!
For more inspirations and tips, check out The Kitchn or visit Serious Eats for more delicious recipes and baking advice!
Print7 Flavorful Reasons to Bake This Stunning Loaf with Turkey Bacon
Discover why this turkey bacon loaf is a must-bake with 7 delicious reasons!
- Prep Time: 15 minutes
- Cook Time: 45 minutes
- Total Time: 1 hour
- Yield: 1 loaf 1x
- Category: Bread
- Method: Baking
- Cuisine: American
- Diet: Non-Vegetarian
Ingredients
- 2 cups all-purpose flour
- 1 teaspoon baking powder
- 1/2 teaspoon baking soda
- 1/2 teaspoon salt
- 1 cup buttermilk
- 1/4 cup honey
- 1/2 cup cooked turkey bacon, chopped
- 1/4 cup chopped green onions
Instructions
- Preheat your oven to 350°F (175°C) and grease a loaf pan.
- In a large bowl, mix together flour, baking powder, baking soda, and salt.
- In another bowl, whisk together buttermilk and honey.
- Combine wet and dry ingredients until just mixed.
- Fold in turkey bacon and green onions.
- Pour the batter into the prepared loaf pan.
- Bake for 40-45 minutes, or until a toothpick comes out clean.
- Let it cool before slicing.
Notes
- Make sure to use cooked turkey bacon for best results.
- This loaf pairs well with a side salad.
Nutrition
- Serving Size: 1 slice
- Calories: 180
- Sugar: 5g
- Sodium: 250mg
- Fat: 7g
- Saturated Fat: 2g
- Unsaturated Fat: 3g
- Trans Fat: 0g
- Carbohydrates: 25g
- Fiber: 1g
- Protein: 6g
- Cholesterol: 15mg
Keywords: turkey bacon loaf, bread, easy recipe, savory bread