Introduction to Homemade Chocolate Turtles
The Nostalgia of Homemade Candy
There’s something undeniably comforting about homemade candy that transports us back to simpler times. Remember the joy of unwrapping a homemade treat from a loved one, each bite bursting with rich flavors? For many, Homemade Chocolate Turtles evoke fond memories of bustling kitchens and the delightful aromas of melting chocolate and sweet caramel. Making your own candy can be an experience filled with joy and bonding, whether you’re revisiting childhood traditions or creating new ones with friends.
Why Homemade is Better than Store-Bought
While it’s easy to grab a box of chocolate turtles from the store, making them at home allows you to craft a treat tailored to your tastes and preferences. Store-bought varieties often contain preservatives and artificial flavors, while your homemade creations come packed with freshness and quality. Plus, you have the freedom to experiment! Want to add a hint of sea salt or use dark chocolate instead of milk? The choice is yours. Did you know that making your own candy can also be a healthier option? You can control the sugar content and select high-quality nuts—like pecans or walnuts—adding nutritional value to your dessert.
What to Expect in This Recipe
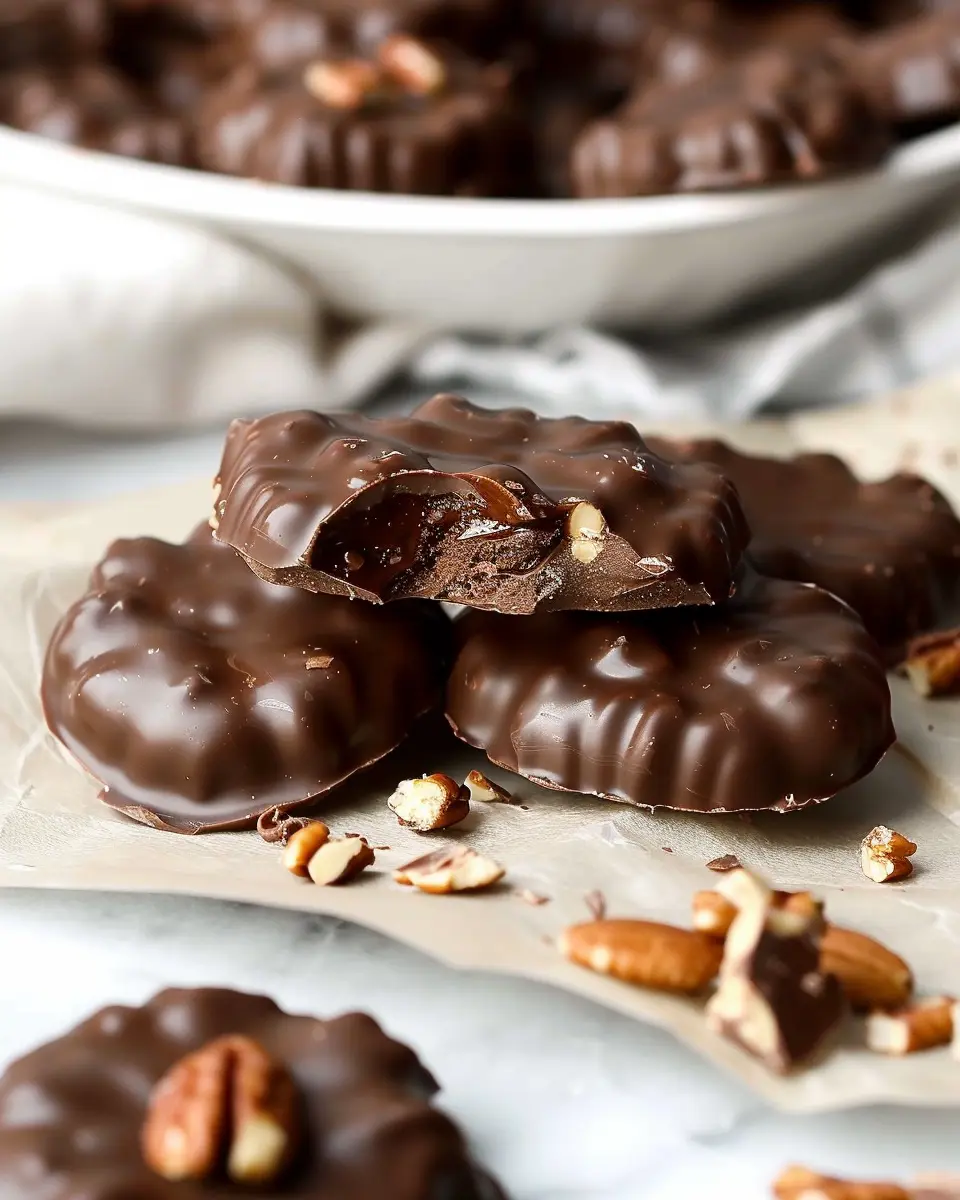
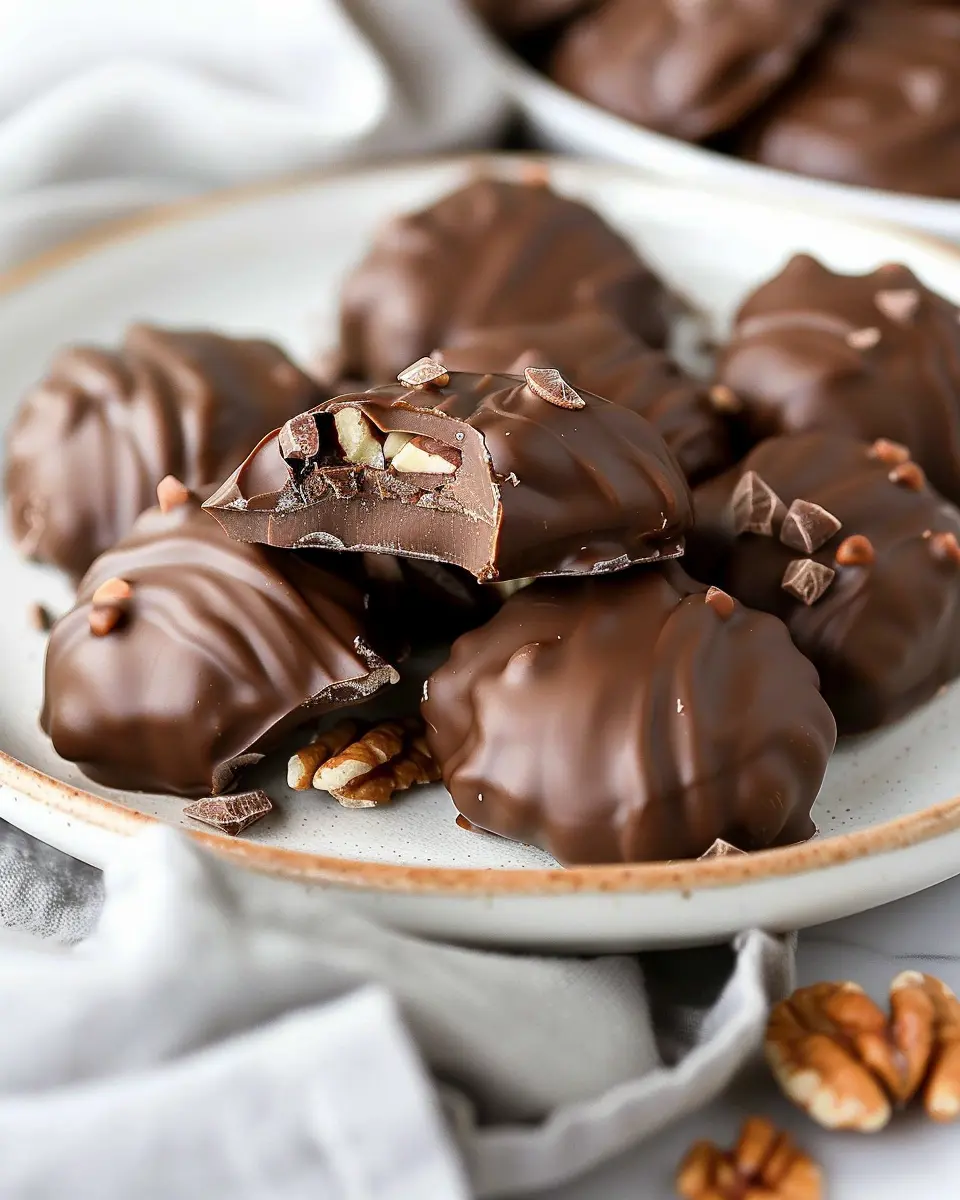
In this Homemade Chocolate Turtles recipe, you’ll discover just how simple and rewarding it is to create your own candy masterpiece. Expect a delightful mixture of crunchy nuts, gooey caramel, and smooth chocolate, each element complementing the other perfectly.
Here’s a sneak peek at what you’ll need:
- Pecans (or your nut of choice)
- Soft caramel candies
- Quality chocolate (dark or milk, depending on your preference)
You will get step-by-step directions that guide you through melting, assembling, and chilling your candy creations. It’s a fun project that can be shared—imagine gifting these beautifully crafted delights to friends and family, or simply indulging in them yourself.
So, roll up your sleeves, and let’s dive into the art of making Homemade Chocolate Turtles! Whether you’re a seasoned pro or a novice in the kitchen, this recipe guarantees a delightful outcome that’s sure to impress.
Ingredients for Homemade Chocolate Turtles
Creating your own Homemade Chocolate Turtles is a delightful experience, and it all starts with the right ingredients. Here’s what you’ll need to create these sweet, gooey treats.
List of essential ingredients
- Pecans: These are a must for that signature crunch.
- Caramel: Go for either store-bought or homemade—both are delicious.
- Chocolate: Use quality chocolate to achieve that rich, velvety finish.
- Sea salt (optional): Just a sprinkle can enhance the flavors beautifully.
Suggestions for high-quality chocolate
When it comes to chocolate, aim for at least 60% cocoa content for a deeper, more satisfying flavor. Brands like Ghirardelli or Guittard are excellent choices for melting due to their smooth texture.
Equipment you’ll need
Don’t forget to gather a few tools before you start:
- Baking sheet: Line it with parchment paper for easy cleanup.
- Saucepan: For melting your caramel and chocolate.
- Spoon or spatula: To mix and drizzle.
- Candy thermometer (if making caramel from scratch): This will help ensure the perfect consistency.
Stocking up on these essentials will make your journey into the world of Homemade Chocolate Turtles as smooth as the caramel itself!
Preparing Homemade Chocolate Turtles
Crafting your own homemade chocolate turtles is not only a delightful culinary adventure but also a heartwarming way to share sweet moments with friends and family. These treats, combining the rich flavors of chocolate, pecans, and caramel, are sure to impress anyone who’s lucky enough to enjoy them. Ready to dive in? Let’s get started!
Gather all your ingredients
Before you start cooking, it’s essential to gather all your ingredients to make the process smooth and enjoyable. For your homemade chocolate turtles, you’ll need:
- Pecans: About 2 cups of halved pecans are ideal.
- Caramel: You can use store-bought soft caramel candies (like Kraft) or make your own.
- Chocolate: A good quality dark or milk chocolate chips, around 2 cups, for dipping.
- Sea salt: A pinch for that extra flavor boost.
Having everything prepped and ready to go makes the cooking process much more efficient and fun, don’t you think? According to experts, meal prep can save you time and reduce stress in the kitchen.
Toast and chop the pecans
Next up, let’s add that incredible nutty flavor! Toasting the pecans enhances their flavor and crunchiness. Simply preheat your oven to 350°F (175°C), spread the pecans on a baking sheet, and toast them for about 8-10 minutes or until they turn golden brown. Keep an eye on them as nuts can quickly go from perfectly toasted to burnt.
Once they’re done, let them cool and chop them roughly. You want them to maintain some texture and not turn into a powder. Not a big fan of pecans? You could use almonds or hazelnuts instead; the choice is yours!
Make the microwave caramel
Now, let’s tackle the star of the show: the caramel. Making caramel can feel a bit daunting, but using the microwave simplifies the process significantly. Place about 14-16 unwrapped caramel candies in a microwave-safe bowl. Add a spoonful of heavy cream to help with consistency. Microwave for 30 seconds, stir, and heat in additional 15-second intervals until smooth. Voilà! Homemade caramel ready to drizzle.
For an expert tip: if you want to elevate the caramel flavor, consider adding a touch of vanilla extract or a pinch of salt.
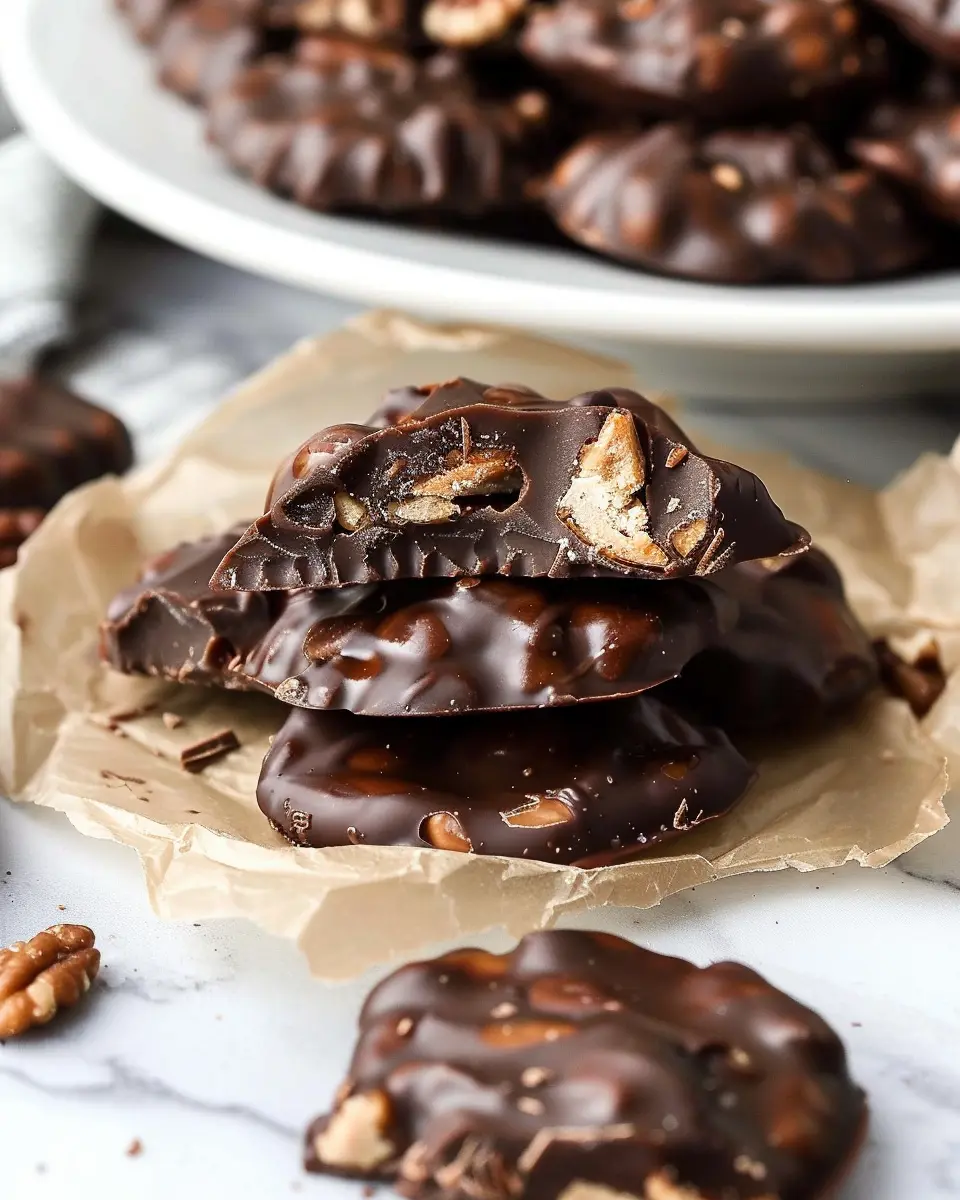
Forming the turtle clusters
This is where the magic happens! On a parchment-lined baking sheet, create small clusters of your toasted pecans—about 5-6 pecans per cluster. Drizzle or dollop a spoonful of caramel over each cluster. Don’t worry about being perfect; the irregular shapes give them a homemade charm.
Allow these to cool and set for about 10-15 minutes. While waiting, you can take a moment for yourself—pour a warm drink, perhaps a cup of hot cocoa or a savory herbal tea.
Melt the chocolate
As your caramel sets, it’s time to melt the chocolate. Use a double boiler for the best results, or you can microwave chocolate chips in 30-second intervals, stirring until smooth. The goal here is to melt evenly without burning. Chocolate can be temperamental, so be patient!
Dipping and setting the turtles
Finally, dip each caramel-coated pecan cluster into the melted chocolate, making sure they’re well-coated all over. Use a fork to lift them and let any excess chocolate drip back into your bowl. Place them back on the parchment paper and, if feeling adventurous, sprinkle a pinch of sea salt on top for that perfect sweet-and-salty combo.
Let your homemade chocolate turtles cool completely until the chocolate hardens—a process that usually takes about 30 minutes. And there you have it! A batch of delightful homemade chocolate turtles to share or keep all to yourself. Who wouldn’t want to indulge in these sweet treats?
For further inspiration, check out this chocolate melting guide to get the best results with your chocolate. Happy indulging!
Variations on Homemade Chocolate Turtles
When it comes to crafting your own Homemade Chocolate Turtles, the fun really begins with customization! Let’s explore some delicious variations that can elevate your candy-making game and suit your taste preferences.
Alternative nuts and fillings for customization
While pecans are the traditional choice, don’t hesitate to experiment with other kinds of nuts. Walnuts, almonds, and macadamia nuts provide unique flavor profiles that can be just as delightful. If you’re a fan of a little crunch, add in some crushed pretzels or crispy rice cereal to give your turtles an extra dimension. For a fun twist, consider stuffing your turtles with a dollop of peanut butter, caramel, or even a surprise chip of your favorite chocolate.
Vegan or dairy-free options
Want to make your Homemade Chocolate Turtles vegan? It’s easier than you think! Use dairy-free dark chocolate and opt for maple syrup for the caramel layer. Nuts like cashews or Brazil nuts work wonderfully, providing a creamy base that mimics traditional caramel without any dairy. The result? A tasty treat that’s 100% plant-based.
Flavor variations to try
Feeling adventurous? Experimenting with flavors can lead to some amazing results. Consider adding a touch of sea salt to your chocolate to create a salted caramel effect. For a more indulgent option, mix in some coffee granules to the chocolate for a mocha twist. If you enjoy spices, a pinch of cinnamon or a touch of cayenne pepper can add a surprising depth to your turtles.
With these variations, your Homemade Chocolate Turtles are sure to impress friends and family alike. For more ideas on innovative candy recipes, check out Serious Eats for additional inspiration! Enjoy the creative process, and don’t be afraid to share your unique creations!
Cooking Tips and Notes for Homemade Chocolate Turtles
Tips for Perfecting the Caramel
Getting that perfect caramel texture is crucial for your Homemade Chocolate Turtles. Here’s how to nail it:
- Use a Candy Thermometer: Aim for a temperature of 240°F (soft ball stage) for the ideal chewy consistency.
- Don’t Rush It: Patience is key! Stir the mixture constantly while it cooks to prevent burning and achieve that luscious golden color.
- Add a Pinch of Salt: A small amount of salt enhances the flavor and balances the sweetness.
How to Store Chocolate Turtles Effectively
To keep your Homemade Chocolate Turtles fresh and delicious:
- Air-tight Containers: Store them in an air-tight container to maintain freshness and prevent them from sticking together.
- Refrigerate: If you live in a warm climate, refrigerate them to keep the chocolate from melting. Just remember to let them sit at room temperature before serving for the best taste and texture.
- Layering is Key: If you need to stack them, place parchment paper between layers to avoid sticking.
Feel free to explore more about candy making techniques on websites like Serious Eats or Bon Appétit for additional insights. Happy cooking!

Serving suggestions for Homemade Chocolate Turtles
Creative ways to serve and present the turtles
When it comes to Homemade Chocolate Turtles, presentation can elevate your tasty treats to the next level. Try arranging them in a decorative box or a rustic wooden platter, perfect for sharing at gatherings. You can also nestle them in cupcake liners for an elegant touch, making them wonderful gifts for friends or coworkers. Adding a sprinkle of sea salt or a drizzle of caramel on top can add a lavish flair that’ll impress anyone.
Pairing suggestions for a delightful snack
To make your Homemade Chocolate Turtles even more enjoyable, consider pairing them with warm beverages. Rich coffee enhances the chocolate flavors, while a soothing cup of herbal tea can create a delightful contrast. Fancy a little fun? Hot chocolate with a hint of cinnamon offers a cozy option for chilly evenings. These pairings not only complement the sweetness of your turtles but also elevate your snacking experience. For more inventive pairing ideas, check sites like Serious Eats and Food52 for inspiration.
Time breakdown for Homemade Chocolate Turtles
Preparation time
Getting ready to whip up those delicious Homemade Chocolate Turtles will take you about 15 minutes. You’ll need to gather your ingredients, including nuts, caramel, and of course, your favorite chocolate. It’s efficient to measure everything out before starting, making the cooking process seamless.
Cooking time
The actual cooking time is around 20 minutes. This is when the magic happens as you melt the chocolate and create the delectable caramel. Make sure you keep an eye on the heat to achieve that perfect consistency—your patience will pay off!
Total time
In total, you’re looking at 35 minutes from start to finish. Just enough time to enjoy some tunes while you bring these treats to life. Remember, the best things come to those who wait, especially in the case of chocolate turtles. For more tips on timing in the kitchen, check out this guide on “cooking times for common ingredients” at Epicurious. Happy cooking!
Nutritional Facts for Homemade Chocolate Turtles
Caloric Content per Turtle
When indulging in Homemade Chocolate Turtles, it’s essential to be mindful of your caloric intake. Each turtle typically contains around 120-150 calories, depending on the ingredients you choose and portion sizes. While they’re a delightful treat, moderation is key!
Breakdown of Key Nutrients
Not only do these sweet bites satisfy your cravings, but they also offer some nutritional benefits. Here’s the scoop:
- Fats: About 8-10 grams, primarily from the nuts and chocolate.
- Carbohydrates: Roughly 15-20 grams, mainly from sugars.
- Proteins: Around 2-3 grams, sourced from nuts like pecans or walnuts.
So, while these Homemade Chocolate Turtles are not a health food, they can fit into a balanced diet when enjoyed occasionally. For a healthier twist, consider using dark chocolate, which contains antioxidants that can benefit heart health. If you want to dive deeper into healthy eating, check out resources from the USDA or Harvard Health.
So, what do you think? Are you ready to whip up a batch of these tasty treats?
FAQs about Homemade Chocolate Turtles
Making homemade chocolate turtles can be a delicious adventure, but you might have some burning questions along the way. Let’s tackle a few common queries to help you out.
What’s the best way to ensure my caramel turns out right?
The key to perfect caramel is temperature and patience. Use a candy thermometer to monitor the heat; you want it to reach about 240°F (soft ball stage). Stir constantly to prevent burning, and consider using a heavy-bottomed pot for even heat distribution. If you’re new to candy-making, check out detailed resources on caramel making techniques.
Can I substitute ingredients for allergies or preferences?
Absolutely! For homemade chocolate turtles, you can use gluten-free graham crackers instead of traditional ones. For nut allergies, sunflower seeds can replace pecans. There’s plenty of flexibility; just ensure that your substitutes can hold their shape in the turtle form.
How long do chocolate turtles typically last?
Once made, your homemade chocolate turtles can last for about 2 weeks when stored in an airtight container at room temperature. If you want to extend their life, consider refrigerating them for up to a month, but be aware that refrigeration can change their texture.
What’s the best method for melting chocolate?
Melting chocolate can be done either in a microwave or using a double boiler. For microwave methods, heat the chocolate in increments of 30 seconds, stirring in between to avoid scorching. The double boiler method offers more control: simply set a heatproof bowl over simmering water, stirring continuously until smooth. This technique is recommended by chocolate experts for achieving that silky finish you’re aiming for!
These tips should set you up for success with your homemade chocolate turtles. Get ready to impress friends and family with your culinary skills!
Conclusion on Homemade Chocolate Turtles
Recap of Why Making Chocolate Turtles is Worthwhile
Creating Homemade Chocolate Turtles is not just about satisfying your sweet tooth; it’s a delightful experience that combines the joy of cooking with the pleasure of indulging in something truly special. Each layer—from the crunchy pecans to the smooth caramel and luscious chocolate—works harmoniously, making each bite a blissful treat. Plus, knowing you made it yourself adds a layer of satisfaction that store-bought chocolates simply can’t match.
Encouragement to Give the Recipe a Try
So, why not roll up your sleeves and give this recipe a go? It’s approachable for all skill levels and perfect for impressing friends or simply treating yourself. Whether you’re enjoying a quiet night in or celebrating a special occasion, these Homemade Chocolate Turtles are sure to be a hit. Trust me, once you try them, you’ll wonder how you ever lived without this sweet delight in your life! For more inspiration, explore related recipes at Food Network or check out tips on chocolate from Serious Eats.
PrintHomemade Chocolate Turtles: Indulgent Treats for Everyone
Discover the delightful world of homemade chocolate turtles, a treat that combines sweet caramel, crunchy nuts, and rich chocolate.
- Prep Time: 15 minutes
- Cook Time: 20 minutes
- Total Time: 35 minutes
- Yield: 12 servings 1x
- Category: Desserts
- Method: Baking
- Cuisine: American
- Diet: Vegetarian
Ingredients
- 1 cup pecans
- 1 cup chocolate chips
- 1 cup caramel candies
- 1 tablespoon heavy cream
Instructions
- Preheat the oven to 350°F (175°C).
- Spread pecans on a baking sheet and toast for about 10 minutes.
- Melt caramel candies with heavy cream in a saucepan over low heat.
- Place a dollop of caramel on each pecan and let it cool.
- Melt chocolate chips in a microwave or double boiler.
- Dip each caramel-covered pecan into the melted chocolate.
- Place on parchment paper to set.
Notes
- For a crunchier texture, allow the pecans to cool completely before adding the caramel.
- Feel free to use dark or milk chocolate based on your preference.
Nutrition
- Serving Size: 1 turtle
- Calories: 150
- Sugar: 15g
- Sodium: 50mg
- Fat: 9g
- Saturated Fat: 5g
- Unsaturated Fat: 4g
- Trans Fat: 0g
- Carbohydrates: 17g
- Fiber: 1g
- Protein: 2g
- Cholesterol: 5mg
Keywords: Homemade Chocolate Turtles, chocolate turtle recipe, chocolate treats