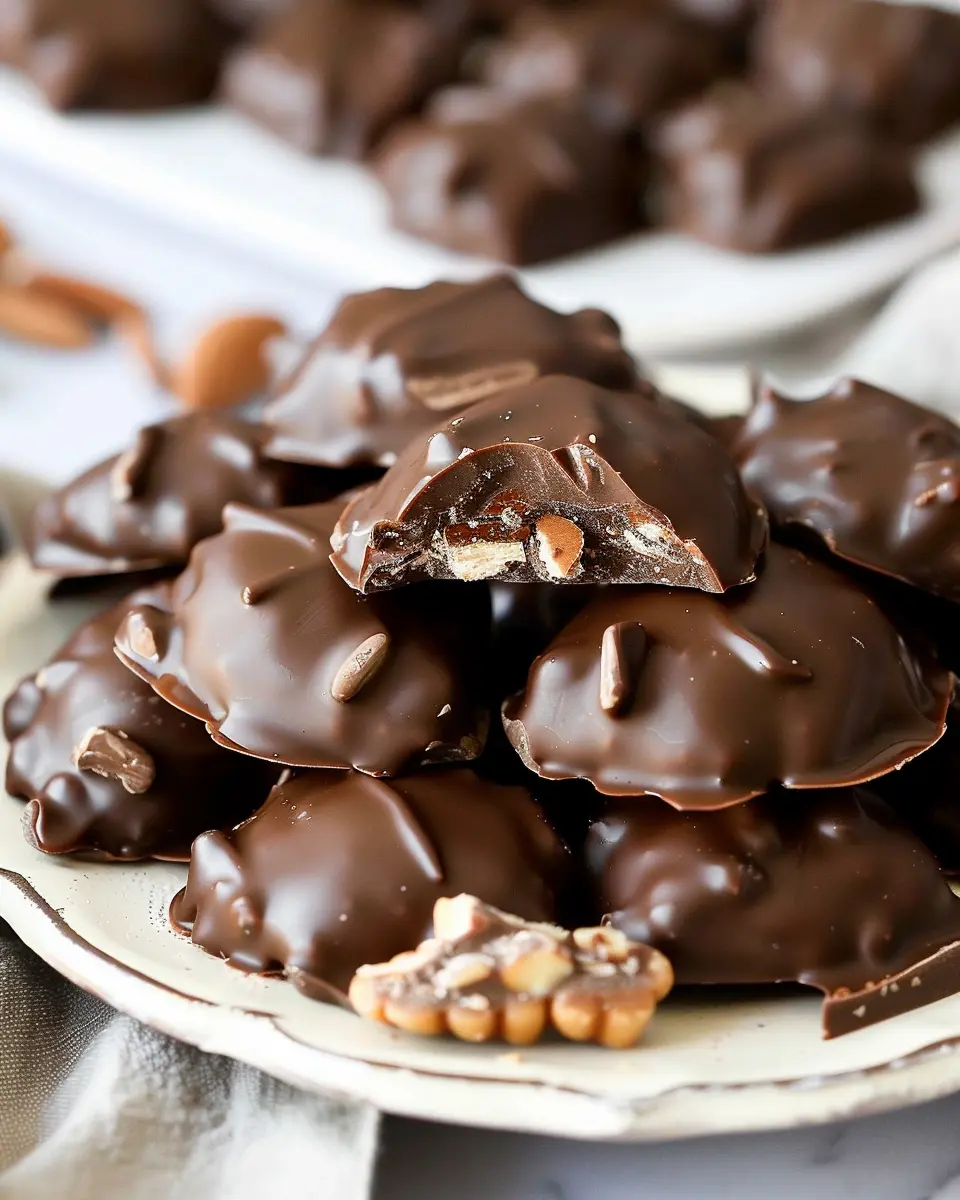
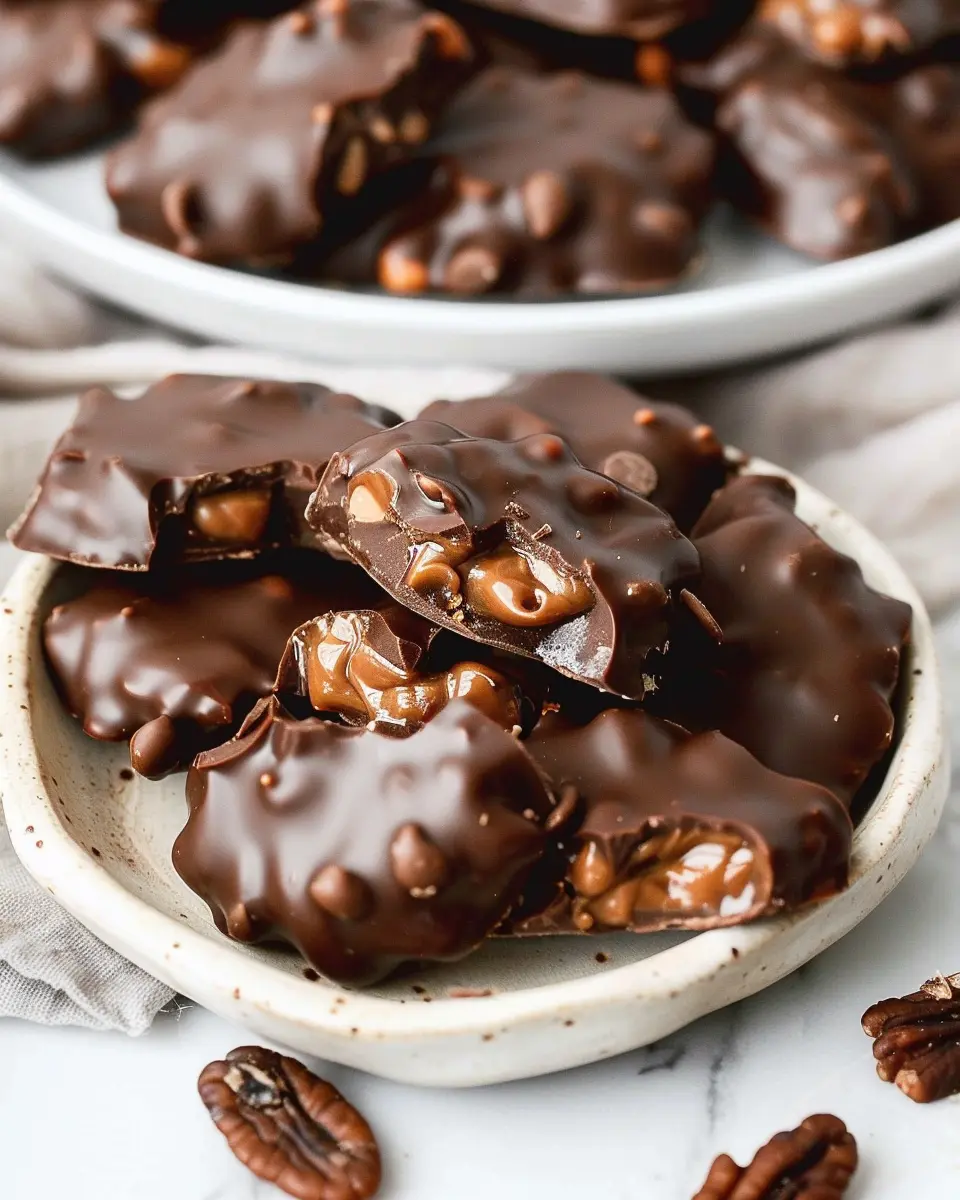
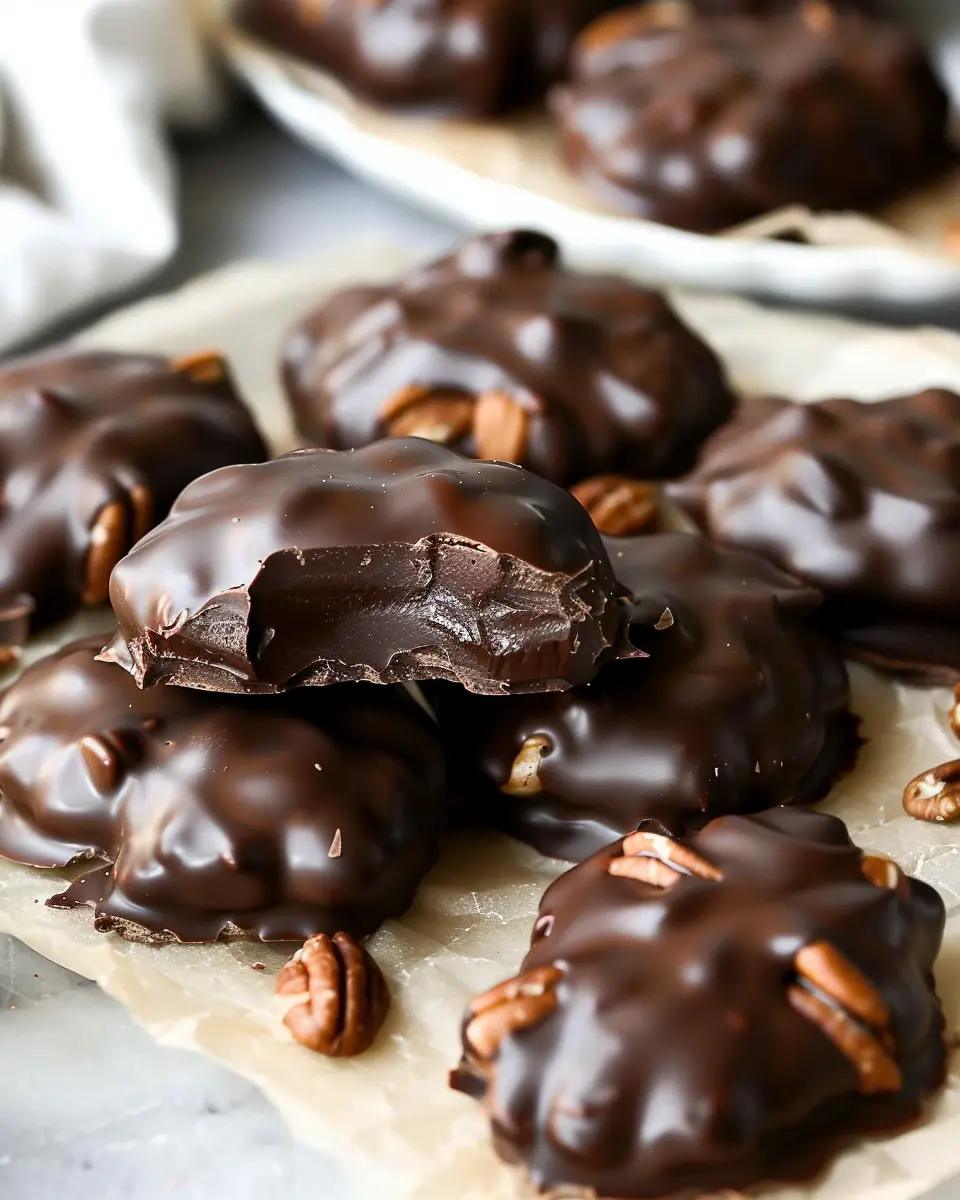
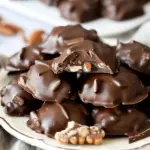
Introduction to Homemade Chocolate Turtles
If you’re looking for a delightful treat that combines sweet, nutty, and chocolaty goodness, Homemade Chocolate Turtles have your name written all over them. These little treasures are made from just a few simple ingredients, yet they bring a level of indulgence that can easily impress friends and family. Picture this: a crunchy pecan base encased in buttery caramel, all drizzled in rich chocolate. Sounds tempting, right?
What Makes Homemade Chocolate Turtles Irresistible?
So, what is it that makes Homemade Chocolate Turtles so special? For starters, the flavor profile is a masterpiece. The nuttiness of roasted pecans complements the sweetness of caramel, while the dense dark chocolate envelops everything, creating a symphony of textures and tastes in every bite. This treat manages to strike a perfect balance—it’s neither too sweet nor too rich, making it an anytime snack.
The best part? You can customize them to suit your taste. Whether you prefer semi-sweet chocolate, milk chocolate, or even a swirl of white chocolate, the choice is entirely yours! And if you’re feeling adventurous, consider adding a sprinkle of sea salt on top to enhance that chocolaty goodness even further.
Homemade Chocolate Turtles also make for a fantastic gift. They’re simple enough to whip up on a weekend afternoon yet elegant enough to present as a thoughtful homemade gift. Imagine gifting a box of these delicious turtles to a friend or taking them to a potluck—trust me, they will be the highlight of the event.
Moreover, making these chocolate delights is not just about satisfying your sweet tooth; it’s also a fun-filled activity. It’s always better to make these treats as a DIY project with friends or family, adding laughter and warmth to your kitchen.
For some inspiration and tips on mastering the caramel process, check out this helpful guide on making perfect caramel from Serious Eats.
Are you ready to get started on your homemade chocolate adventure? Your tastebuds will thank you, and you might just discover your new favorite treat!
Ingredients for Homemade Chocolate Turtles
Essential ingredients for a delightful treat
Creating homemade chocolate turtles is both fun and rewarding. To get started, you will need a few key ingredients that come together to create this scrumptious treat:
- Pecans: Use whole or halved pecans for a delightful crunch. They are the heart of the turtle, imparting that rich, nutty flavor.
- Caramel: Soft caramels are ideal; you can either buy pre-made or make your own at home for a richer taste.
- Chocolate: Milk chocolate is commonly used, but dark chocolate can add a gourmet twist. Opt for good-quality chocolate to ensure it melts smoothly.
- Sea salt (optional): A pinch can elevate your turtles with a perfect sweet-and-salty balance.
Ingredient substitutes for dietary preferences
Don’t let dietary preferences hold you back from enjoying your homemade chocolate turtles! Here are a few swaps you can consider:
- Nuts: If you’re nut-free, sunflower seeds can work as a substitute for pecans.
- Chocolate: For a dairy-free version, use vegan chocolate; there are fantastic options available that still taste divine.
- Caramel: Explore homemade vegan caramel recipes made from coconut milk or almond butter, ensuring your treat remains guilt-free and delicious.
With these ingredients, you’re well on your way to crafting a delicious batch of homemade chocolate turtles! Have fun experimenting and making this classic treat your own! For more detailed recipes and ideas, check out the Nuts for Turtles guide for inspiration.
Step-by-step preparation of Homemade Chocolate Turtles
Creating Homemade Chocolate Turtles is not only a fun experience but also a rewarding one. These delicious treats combine the richness of chocolate with the nuttiness of pecans and the sweetness of caramel, making them perfect for a special occasion or a simple indulgence. Let’s jump into this delightful process!
Gather your equipment and ingredients
Before you dive into making your Homemade Chocolate Turtles, it’s essential to gather all the necessary tools and ingredients. This will save you time and keep the process smooth.
You’ll need:
-
Equipment:
-
Baking sheet
-
Parchment paper or silicone mat
-
Microwave-safe bowl
-
Mixing spoon
-
A spatula for spreading caramel
-
Tempering thermometer (optional)
-
Ingredients:
-
2 cups of pecans (halved)
-
14 oz. of caramel candies
-
2 tablespoons of heavy cream
-
8 oz. of dark or milk chocolate (your choice)
-
Sea salt for garnish (optional)
Having everything ready will set you up for a successful baking session. Trust me; there’s nothing worse than scrambling around for ingredients while the caramel is melting!
Toast and chop the pecans
Start by toasting the pecans to enhance their flavor. Preheat your oven to 350°F (175°C). Spread the pecans onto a baking sheet and toast them for about 5-7 minutes, stirring occasionally, until they’re golden brown. This step is crucial, as it adds depth to the flavor of your Homemade Chocolate Turtles.
Once toasted, chop them roughly, but not too fine—you still want those delicious chunks of pecan in your turtles.
Make the microwave caramel
Now comes the star of the show: homemade caramel! In a microwave-safe bowl, combine the caramel candies and heavy cream. Microwave in 30-second intervals, stirring between each interval until the mixture is smooth and fully melted. This usually takes about 1-2 minutes total.
Be cautious while handling hot caramel, as it can burn easily. If you’re looking for a perfect caramel recipe, consult sources like the Sally’s Baking Addiction for tips!
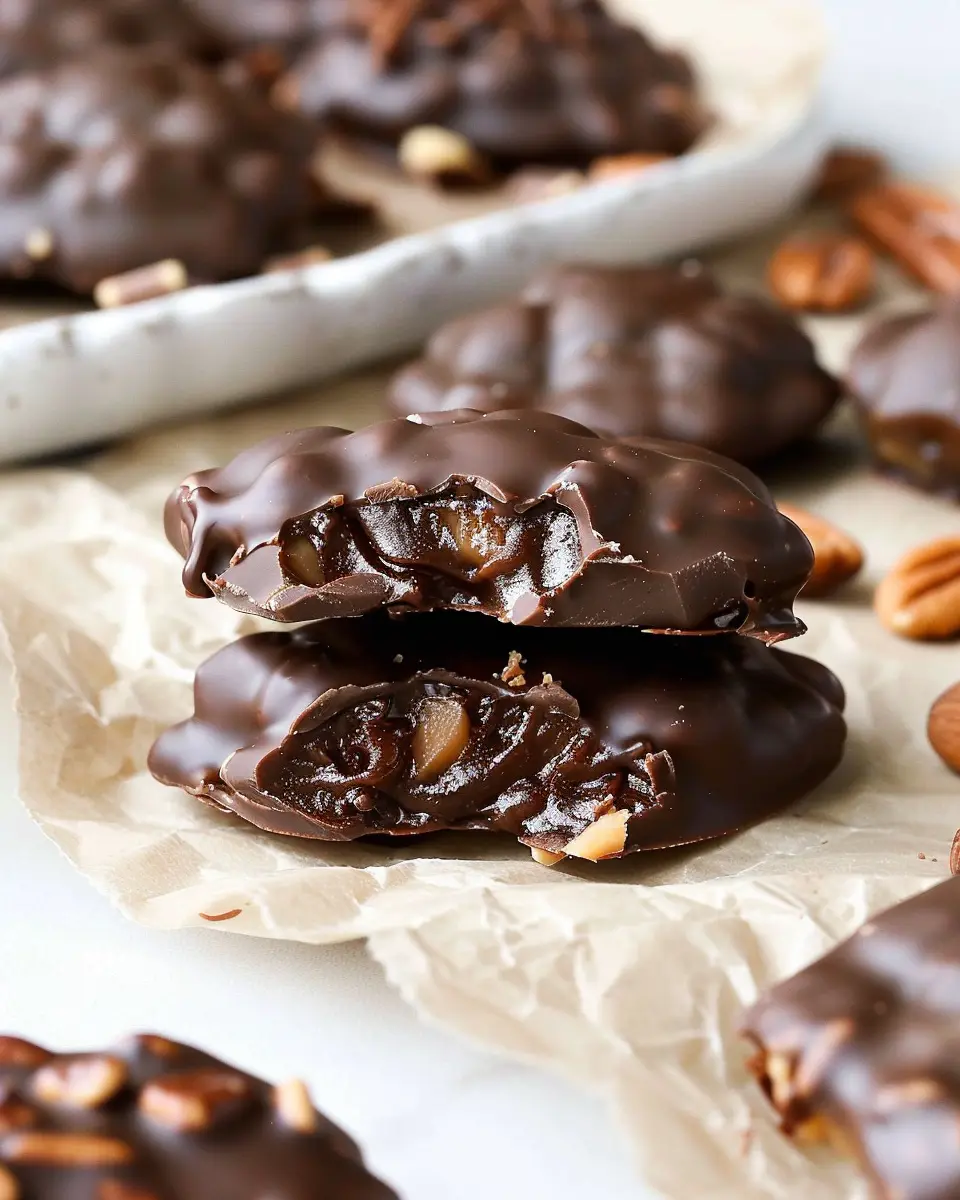
Form the turtle clusters
To assemble your Homemade Chocolate Turtles, start by placing a tablespoon of the chopped pecans on a piece of parchment paper. This will serve as the base for each turtle.
Next, drizzle a spoonful of the warm caramel over the pecans, ensuring they are covered nicely. Aim for a mound that is slightly rounded—this will create those characteristic turtle shapes.
Melt and dip in chocolate
Melt your chocolate in a microwave-safe bowl using the same method as for the caramel (30-second intervals, stirring each time). Once melted, use a fork or a dipping tool to dip each caramel-pecan cluster into the chocolate, coating it thoroughly.
Let any excess chocolate drip off and place the chocolate-covered turtles back on the parchment paper.
Set and store your chocolate turtles
After dipping, it’s time to let the chocolate set. You can leave them at room temperature for about 30 minutes, or if you’re short on time, pop them into the fridge for about 10-15 minutes until the chocolate is firm.
Store your Homemade Chocolate Turtles in an airtight container. They can last about a week at room temperature or longer (up to two weeks) in the refrigerator.
Enjoy sharing them with friends or savoring them yourself! These delectable bites of joy will surely impress anyone lucky enough to taste them. Happy indulging!
Variations on Homemade Chocolate Turtles
When it comes to indulging in the sweet allure of Homemade Chocolate Turtles, the possibilities are as delightful as they are diverse. Here are some scrumptious variations that cater to different dietary preferences while ensuring that everyone can enjoy this classic treat.
Classic Chocolate Turtles with Pecans
The traditional combination of caramel, chocolate, and crunchy pecans is a timeless favorite. To whip up classic chocolate turtles:
- Ingredients: Pecans, caramel candies, and your choice of semisweet chocolate.
- Instructions: Melt the caramel and drizzle it over clusters of pecans, then coat them in melted chocolate. Allow them to cool on parchment paper.
This version not only tantalizes the taste buds but also plays on texture, with the crunch of pecans providing a perfect contrast to the smooth chocolate.
Vegan Alternative Chocolate Turtles
Craving that rich flavor while keeping it plant-based? Vegan Homemade Chocolate Turtles can be a delightful substitute.
- Ingredients: Use coconut cream for the caramel and dairy-free chocolate.
- Instructions: Prepare a simple caramel using coconut cream and date syrup, pour it over a base of nuts or seeds, and finish with melted dairy-free chocolate.
As more people transition to vegan diets, finding satisfying recipes is essential. According to the Plant-Based Foods Association, vegan options are growing in popularity, making this variation not only delicious but also trend-sensitive.
Nut-Free Chocolate Turtles Using Seeds
If you need a nut-free option, consider using seeds!
- Ingredients: Pumpkin seeds or sunflower seeds replace the nuts for a crunchy texture.
- Instructions: Follow the traditional process, substituting seeds for nuts, and enjoy a similar flavor profile.
These nut-free Homemade Chocolate Turtles are perfect for schools or gatherings where allergies are a concern, ensuring everyone can join in the sweetness!
For more tips on customizing your treats, check out The Spruce Eats for inspiration. Let this guide inspire your next batch, and happy cooking!
Cooking Tips and Notes for Homemade Chocolate Turtles
Ensuring the Perfect Caramel Consistency
Creating Homemade Chocolate Turtles hinges on achieving that delightful caramel texture. To avoid a grainy finish, make sure to use a heavy-bottom saucepan and keep the heat medium-low. Stir continuously, and use a candy thermometer to aim for the soft-ball stage (around 240°F). If you don’t have a thermometer, drop a small spoonful of caramel into cold water; it should form a soft, pliable ball. This step is crucial, as overly cooked caramel can harden and become difficult to work with.
Best Practices for Melting Chocolate
When it comes to melting chocolate for your turtles, patience is key. Use a double boiler for the most consistent results, or opt for the microwave using short bursts of 20 seconds, stirring in between. This method not only prevents scorching but also ensures you achieve a silky smooth finish perfect for coating. For a richer flavor, consider mixing in a little cocoa butter or coconut oil to help the chocolate set beautifully.
For more tips on melting chocolate, check out Fine Cooking for expert advice to master this essential skill. Happy cooking!
Serving suggestions for Homemade Chocolate Turtles
Creative presentation ideas
When it comes to serving Homemade Chocolate Turtles, presentation can really elevate the experience. Consider arranging them on a beautiful wooden platter or a stylish cake stand. You might even include a scattering of sea salt crystals or crushed nuts around the turtles for added flair. For a special touch, wrap each turtle in a decorative foil or place them in cupcake liners. It not only looks great but also makes for an easy grab-and-go treat.
Pairing suggestions for serving
Pairing your delicious Homemade Chocolate Turtles with the right accompaniments can turn them into a standout dessert. Here are some ideas:
- Coffee or Tea: A rich espresso or a soothing herbal tea complements the sweetness perfectly.
- Fresh Fruit: Offer slices of juicy strawberries or tangy orange segments to balance the richness.
- Cheese Board: Include aged cheddar or creamy Brie on a charcuterie board alongside your turtles for a delightful contrast.
When planning your gathering, think about flavors that meld beautifully together. Your guests will appreciate these thoughtful details, making each bite of your Homemade Chocolate Turtles even more enjoyable! For more presentation tips, check out sites like Epicurious for inspiration.
Time breakdown for making Homemade Chocolate Turtles
When you’re craving a sweet treat, nothing beats the nostalgic taste of Homemade Chocolate Turtles. Understanding the time involved can help you plan your day and savor the process. Let’s break it down!
Preparation time
To get started, you’ll spend about 15 minutes gathering your ingredients and prepping your workspace. Make sure you have your pecans, caramel, and chocolate ready to go!
Cooking time
The cooking part is quick, coming in at around 20 minutes. You’ll be melting chocolate and forming the turtles, so keep an eye on the clock to ensure everything is just right.
Total time
In total, you’re looking at roughly 35 minutes from start to finish. It’s a small time investment for a delightful reward. If you’re on the go but want an impressive homemade dessert, these chocolate turtles are perfect to whip up! For further inspiration, check out this guide on homemade candies.
Nutritional facts for Homemade Chocolate Turtles
When indulging in Homemade Chocolate Turtles, it’s essential to balance enjoyment with nutrition. Here’s a quick overview of what one serving (approximately 2 pieces) offers.
Calories per serving
On average, a serving contains about 150 calories. While this may seem indulgent, remember that moderation is key!
Breakdown of key nutrients
These delectable treats provide more than just calories; they also deliver:
- Fat: Approximately 10g, including healthy fats from nuts.
- Saturated Fat: Around 4g, primarily from chocolate.
- Carbohydrates: Roughly 15g, offering a quick energy source.
- Protein: About 2g, thanks to the nuts.
- Fiber: Contains 1g which aids digestion.
For more insights on healthy ingredient choices, you can explore Healthline for valuable information. Enjoying Homemade Chocolate Turtles can fit into a balanced diet, especially when you savor them in moderation!
FAQs about Homemade Chocolate Turtles
How can I make my homemade turtles healthier?
If you’re looking to lighten up your homemade chocolate turtles, there are a few easy tweaks you can make. Instead of standard milk chocolate, consider using dark chocolate with at least 70% cocoa. Not only does this add a rich flavor, but it also provides antioxidants. You might swap traditional pecans for almonds or walnuts, which are great sources of healthy fats. Adding a pinch of sea salt can enhance flavor without excess sugar! For a simpler take, you could drizzle your turtles with a thin layer of chocolate instead of a thick coating, saving calories while still indulging your sweet tooth.
What’s the best way to store chocolate turtles?
To keep your homemade chocolate turtles fresh and delicious, store them in an airtight container in the refrigerator. This helps retain their crunchiness and prevents the chocolate from melting, especially during warmer months. Layering them with parchment paper can also prevent sticking. If they are well sealed, they can stay fresh for up to two weeks; just make sure to allow them to come to room temperature before enjoying for the best flavor!
Can I freeze my homemade turtles?
Absolutely! Freezing your homemade chocolate turtles is a great way to prolong their shelf life. Just ensure each turtle is wrapped individually in plastic wrap or stored in a single layer in an airtight container. When you’re ready to enjoy them, let them thaw in the fridge or at room temperature. Keep in mind that freezing may alter the texture slightly, but they will still taste amazing! If you’re curious about more storage methods, check out this guide on food preservation from Healthline.
By following these tips, you can enjoy your chocolate turtles in a healthier way while keeping them fresh and delectable!
Conclusion on Homemade Chocolate Turtles
Celebrating the joy of homemade treats
In conclusion, Homemade Chocolate Turtles are not just a sweet indulgence; they’re a delightful way to express creativity and share joy with others. There’s a unique satisfaction that comes from crafting your own treats, especially when they combine layers of rich chocolate, creamy caramel, and crunchy nuts. It’s the perfect treat for any occasion, whether it’s a cozy night in or a festive gathering.
Consider wrapping them in a colorful package for a thoughtful gift or simply enjoy them with friends over coffee. The beauty of creating these treats lies in the moments they bring, reminding us of simpler joys. So why not get started on your Homemade Chocolate Turtles adventure today? If you’re looking for further inspiration, check out resources from culinary sites like Epicurious or Serious Eats for more delicious recipes and tips!
PrintHomemade Chocolate Turtles: The Best Indulgent Treat You’ll Love
A delightful recipe for homemade chocolate turtles that combines sweet, creamy caramel with rich chocolate and crunchy nuts.
- Prep Time: 30 minutes
- Cook Time: 15 minutes
- Total Time: 45 minutes
- Yield: 12 servings 1x
- Category: Dessert
- Method: No-bake
- Cuisine: American
- Diet: Vegetarian
Ingredients
- 1 cup roasted pecans
- 1 cup granulated sugar
- 1/2 cup heavy cream
- 1/4 cup unsalted butter
- 1/2 teaspoon vanilla extract
- 8 ounces semisweet chocolate
Instructions
- Prepare a baking sheet by lining it with parchment paper.
- In a saucepan, combine the sugar, heavy cream, and butter over medium heat until the mixture reaches a boil.
- Continue to boil for 5 minutes without stirring, then remove from heat and stir in vanilla.
- Drop spoonfuls of the caramel mixture onto the prepared baking sheet, adding a few roasted pecans on top of each spoonful.
- Allow the caramel to set for about 30 minutes.
- Melt the chocolate in a microwave or double boiler.
- Once the caramel has set, drizzle the melted chocolate over each turtle.
- Let the chocolate cool and harden before serving.
Notes
- For added flavor, sprinkle a pinch of sea salt on top of the turtles before the chocolate hardens.
- Store the turtles in an airtight container to maintain freshness.
Nutrition
- Serving Size: 1 turtle
- Calories: 150
- Sugar: 20g
- Sodium: 15mg
- Fat: 8g
- Saturated Fat: 4g
- Unsaturated Fat: 3g
- Trans Fat: 0g
- Carbohydrates: 18g
- Fiber: 1g
- Protein: 2g
- Cholesterol: 15mg
Keywords: Homemade Chocolate Turtles, chocolate, dessert, recipe