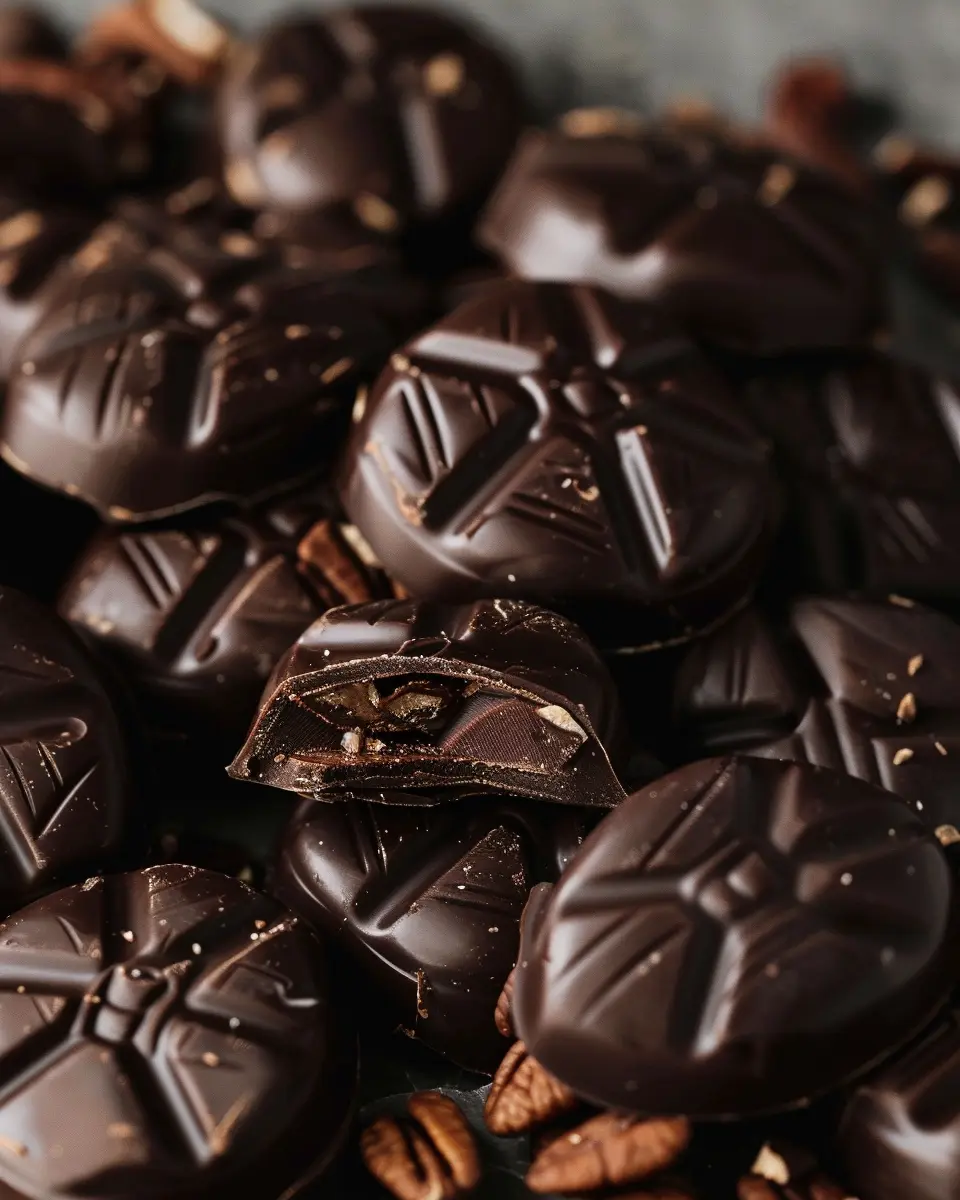
Introduction to Homemade Chocolate Turtles
Why make chocolate turtles at home?
Homemade chocolate turtles are not just a treat; they are an experience in confectionery creation. Why settle for store-bought when you can have a hand-crafted delight that is both delicious and tailored to your palate? By making your own, you can control the ingredients, ensuring quality while accommodating any dietary preferences you or your guests may have. Plus, it’s often more cost-effective than constantly buying those pre-packaged options.
When you dive into making chocolate turtles, you’re stepping into a world where classic flavors meet creativity. Think about the rich taste of pecans paired with buttery caramel and the velvety embrace of smooth chocolate. If you’re a fan of sweet-and-salty combinations, homemade chocolate turtles might just become your new favorite indulgence! For a deeper dive into how you can enhance flavors, check out this neat guide on flavor pairings The Flavor Bible.
The joy of homemade treats
There’s something genuinely special about crafting chocolate turtles with your own hands. It’s not just about the end product; it’s about the joy of the process. Imagine unwrapping a bundle of pecan halves, melting caramel to just the right consistency, and watching as that silky chocolate glaze comes to life. The satisfaction of seeing your creation come together is unmatched.
Whether you’re whipping up a batch for a special occasion or simply wanting to satisfy your sweet tooth, the thrill of making these candies will put a smile on your face. Plus, when you share your homemade treats with friends or family, you’re not just giving them a sweet treat; you’re sharing a piece of your creativity and love.
Making chocolate turtles is a great way to bond with loved ones, too. Gather a few friends for a DIY candy-making night, and you’ll create not just delicious chocolate goodies, but also unforgettable memories. The laughter, the mess, and, of course, the tasting are all part of the fun. So, are you ready to roll up your sleeves and create some magic in your kitchen? Let’s get started!
Ingredients for Homemade Chocolate Turtles
Creating delicious chocolate turtles at home is easier than you might think, and you only need a handful of must-have ingredients to get started.
Must-have ingredients for chocolate turtles
To make your own delightful chocolate turtles, gather these essential ingredients:
- Pecans: About 2 cups, toasted for a rich flavor.
- Caramels: 1 cup; feel free to use soft caramel candies, which will melt beautifully.
- Chocolate: 1 cup, either milk, dark, or semi-sweet, depending on your preference.
- Sea Salt: A sprinkle, to enhance sweetness and add depth.
These ingredients come together to create a confection that tantalizes your taste buds. While the recipe is straightforward, you can find tips and variations here.
Alternative ingredients for those with dietary restrictions
Have dietary concerns? No worries! Here are some swaps:
- Nuts: Use walnuts or almonds for a nut-free alternative.
- Dairy-free Chocolate: Look for vegan chocolate options to keep it dairy-free.
- Vegan Caramel: Brands like Nutiva offer plant-based caramel for a vegan substitute.
Experimenting with these ingredients allows you to enjoy homemade chocolate turtles without compromising on taste!
Preparing Homemade Chocolate Turtles
Creating your own chocolate turtles is not only a delightful cooking project but also a wonderful way to impress your friends and family. With a bit of patience and creativity, you can whip up these sweet treats that combine the rich flavors of chocolate, caramel, and nuts in a satisfyingly chewy texture. Let’s dive into the process of making these irresistible candies.
Gather Your Equipment
Before diving into the chocolate turtles adventure, ensure you have the following essential tools and equipment:
- Baking Sheet: For cooling your turtles.
- Parchment Paper: This will prevent sticking and make clean-up a breeze.
- Microwave-Safe Bowl: Essential for melting the caramel and chocolate.
- Silicone Spatula: Great for stirring and combining ingredients smoothly.
- Cooking Thermometer: To ensure your caramel reaches the right temperature, making it not too hard and not too gooey.
Having everything ready will help streamline your candy-making process, making it both enjoyable and hassle-free.
Toasting the Pecans
A crucial step in elevating the flavor profile of your chocolate turtles is toasting the pecans. Here’s how to do it perfectly:
-
Preheat your Oven: Set it to 350°F (175°C). This is the ideal temperature for toasting.
-
Spread the Pecans: Arrange your pecan halves in a single layer on a baking sheet.
-
Toast: Bake them in the preheated oven for about 8-10 minutes. Keep a close eye on them, as nuts can go from perfectly toasted to burnt in a matter of minutes.
-
Cool: Once they’re golden and fragrant, let them cool completely. This not only enhances the flavor but also adds a delightful crunch.
The toasted pecans will add a nutty depth to your chocolate turtles, which makes all the difference.
Making the Microwave Caramel
Now comes the fun part—creating that luscious caramel! Here’s a quick method using your microwave:
- Ingredients Needed: You’ll need caramels (about 14 oz), and a tablespoon of water.
-
Combine Ingredients: Place the caramels and the water in a microwave-safe bowl. The water helps to create a smoother texture.
-
Microwave: Heat in short 30-second intervals, stirring in between until melted and smooth (about 2–3 minutes total).
-
Consistency Check: The caramel should be pourable but not too runny. If it seems too thick, add a tiny bit more water.
With this quick method, you’ll have rich, buttery caramel ready in no time, making your chocolate turtles truly scrumptious.
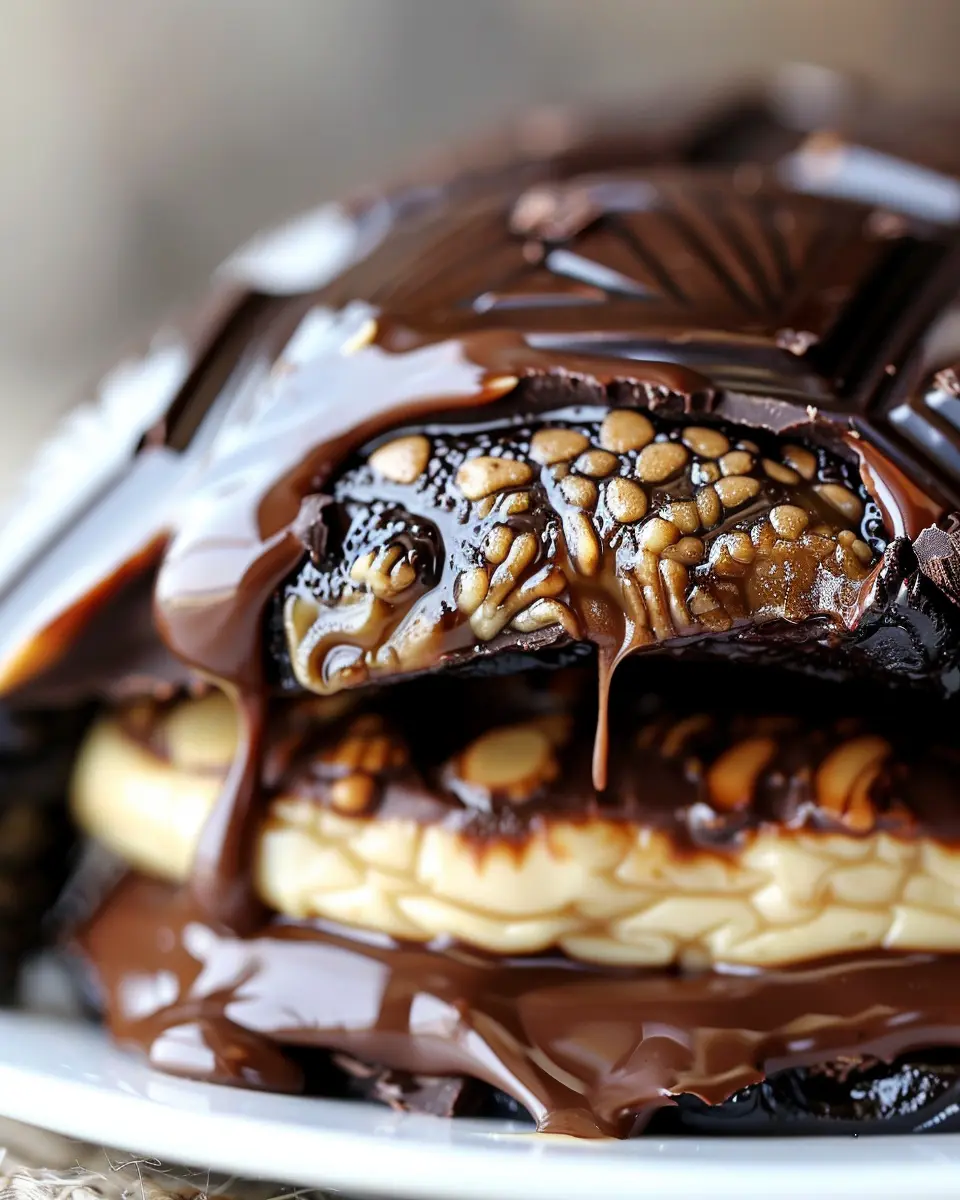
Forming the Turtles
Now that everything is prepped, it’s time to assemble your chocolate turtles:
-
Create Clusters: Using a teaspoon, scoop some pecans and spoon warm caramel over them to form a shape reminiscent of a turtle’s shell.
-
Chill: Place the clusters on a parchment-lined baking sheet and let them set in the refrigerator for about 15–20 minutes.
This is where the magic happens; the caramel firms up around the pecans, creating that iconic turtle shape.
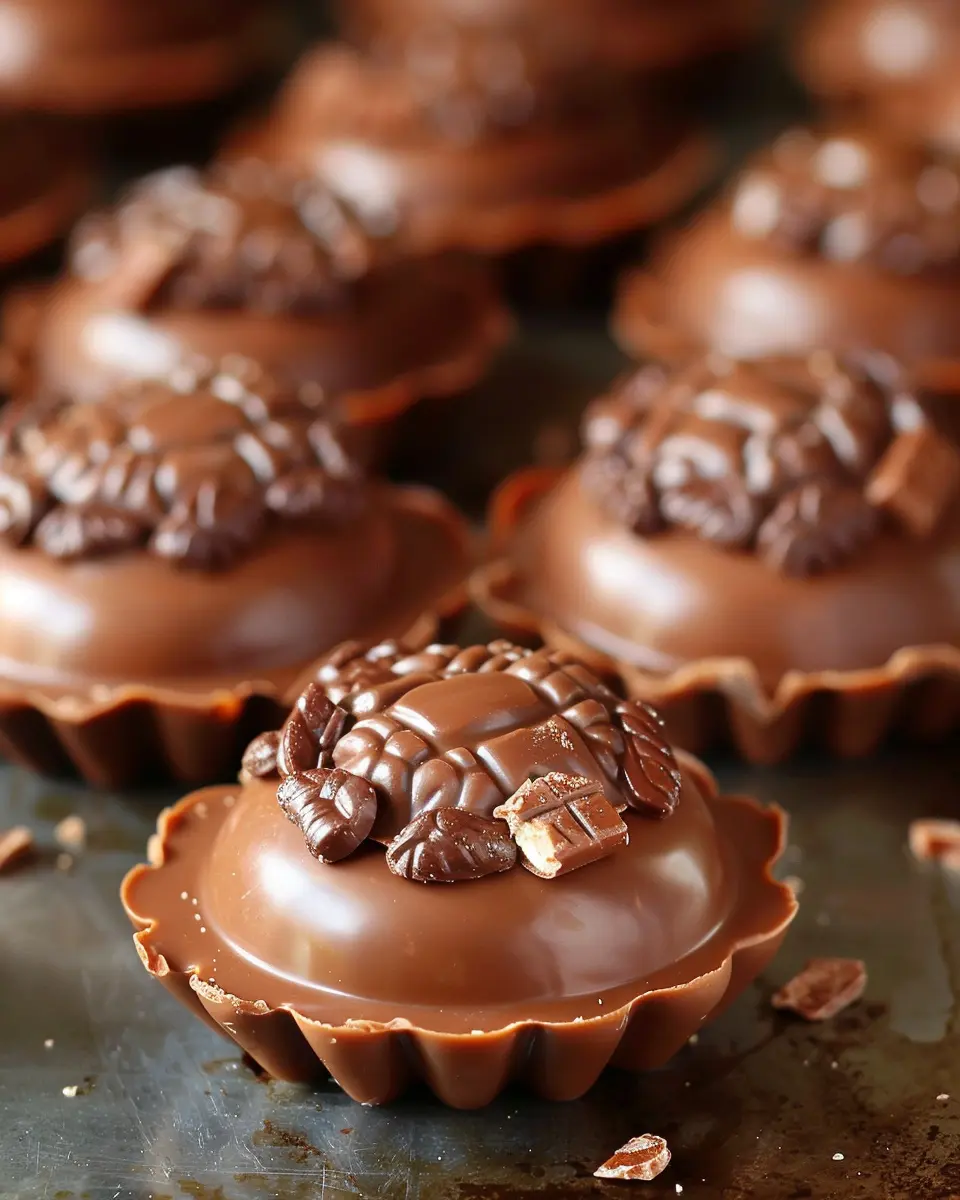
Melting the Chocolate and Dipping
The final step is what brings these chocolate turtles to life: the chocolate coating.
-
Choose Your Chocolate: Dark, milk, or white chocolate works great.
-
Melt: Use the microwave method again, heating your chocolate in 30-second bursts until fully melted and smooth.
-
Dip: Take your chilled pecan-caramel clusters and dip each one into the melted chocolate, ensuring they’re fully coated. You can use a fork to help lift them out.
-
Set: Place the dipped turtles back on the parchment and let them cool until the chocolate hardens.
And there you have it! Your homemade chocolate turtles are ready to enjoy. These mouthwatering treats are perfect for sharing or for enjoying all by yourself—because who doesn’t love a little sweet indulgence? With a little skill and a lot of love, you’ll be the star of any gathering.
For more sweet ideas, consider exploring Nuts.com for high-quality nuts or Cocoa & Co. for different chocolate options. Enjoy the delicious journey of creating these heavenly delights!
Variations on Homemade Chocolate Turtles
Making chocolate turtles at home is not just about the original recipe; it’s about exploring delicious variations that cater to different tastes and dietary preferences. Here are two delightful twists that you can try.
Salted Caramel Chocolate Turtles
If you want to elevate the classic flavor of chocolate turtles, adding a touch of salted caramel is a game changer. Instead of using traditional caramel, opt for a richer, more indulgent salted caramel sauce. Here’s how to make this variation:
- Prepare your ingredients: Start with your chopped nuts (pecans, cashews, or almonds work beautifully) and your favorite chocolate.
- Make the salted caramel: Combine sugar and a pinch of salt in a saucepan, cooking until it turns a golden brown. Then, slowly mix in heavy cream and a bit more salt to taste.
- Assemble: Layer your nuts, drizzle the salted caramel on top, and finish with a coating of melted chocolate.
The contrast between sweet and salty is simply irresistible, making this treat perfect for impressing guests or enjoying during a quiet evening in. For inspiration on achieving that perfect salted caramel, check out this in-depth guide on making salted caramel.
Nut-Free Chocolate Turtles
For those who have nut allergies or prefer a nut-free option, making chocolate turtles remains easy and delicious! A fun substitute is using crispy rice cereal or pretzels to add that satisfying crunch.
- Choose your base: Instead of nuts, go for crispy rice cereal or crushed pretzels.
- Caramel time: Stick to the classic caramel sauce—no changes needed here unless you’d like to experiment with flavors like vanilla or even a hint of espresso.
- Coat with chocolate: Just like the originals, dip your creations in melted chocolate and let them set.
This variation not only provides a nut-free solution but opens up creative avenues for different textures in your chocolate turtles. Plus, you can invite friends with allergies to join in the fun!
Feel free to explore flavor pairings and toppings, and don’t forget to share your unique creations on social media so others can enjoy your tasty innovations!
Cooking tips for Homemade Chocolate Turtles
Avoiding common mistakes in candy making
Making chocolate turtles can feel daunting, but avoiding common pitfalls will keep your batch delicious. First, ensure your caramel is at the right temperature—if it’s too hot, it can burn, and if it’s too cool, it won’t set up correctly. Use a candy thermometer for precision, aiming for the firm-ball stage (around 245°F). Be sure to keep your nuts toasted and ready, as timing is key; you want them to remain crunchy when enveloped in rich chocolate.
The best chocolate to use
When it comes to chocolate for your chocolate turtle creations, quality matters! Choose high-quality dark or milk chocolate—callebaut or Guittard are excellent options. They melt smoothly and provide a rich flavor. To ensure the chocolate coats evenly, temper it first, which can enhance the shine and snap! If you’re not up for tempering, using good melting chocolate chips works well too. Remember, the chocolate is just as essential as the nuts and caramel—so pick your favorite to create that delightful balance.
For additional tips, check out resources by Serious Eats or visit Wilton for more expert insights on candy making. Happy cooking!
Serving Suggestions for Homemade Chocolate Turtles
Creative packaging for gifts
Homemade chocolate turtles make for delightful gifts, especially when presented in charming packaging. Consider using small, clear cellophane bags tied with pretty ribbons. This added touch not only showcases your treats but also enhances that homemade vibe. Alternatively, you could use decorative boxes or tin containers for a more sophisticated look. Personalizing tags with handwritten notes or quotes adds a special sentiment, making your loved ones feel valued and appreciated. For inspiration, you can explore this resource on creative gift-wrapping ideas.
Pairing with beverages or dessert dishes
Thinking about what to pair with your luscious chocolate turtles? Hot beverages like creamy coffee or spiced chai are perfect companions, enriching the rich flavors. For something cooler, try serving them with a scoop of vanilla ice cream or a fruit salad for a refreshing contrast. You might even consider offering a simple herbal tea for a light finish. These pairings not only elevate your dessert experience but also create a delightful atmosphere when shared with friends or family.
Time breakdown for Homemade Chocolate Turtles
Preparation time
Making chocolate turtles is a breeze! You’ll need about 20 minutes to gather your ingredients and prep your work area. Lay out your pecans, soft caramels, and melt your chocolate beforehand to streamline the process.
Cooking time
The actual cooking time is minimal—around 15 minutes. This includes melting your chocolate and combining your ingredients. Don’t worry; you won’t need to babysit it the whole time!
Total time
In total, you’re looking at about 35 minutes from start to finish for these delightful treats. Think about how much joy these chocolate turtles will bring your friends or family. Plus, if you can spare the time to learn about chocolate-making techniques, check out this chocolate-making guide, which dives deeper! Enjoy your delicious adventure!
Nutritional Facts for Homemade Chocolate Turtles
When indulging in chocolate turtles, it’s good to be aware of what they bring to the table nutritionally. These delightful treats, made with pecans and caramel, offer a sweet escape while still having some nutritional components worth noting.
Total Calories
A serving of homemade chocolate turtles generally ranges from 150 to 200 calories, depending on the size and ingredients used. If you’re watching your calorie intake, consider enjoying them in moderation!
Sugar Content
These little confections are certainly on the sweeter side. A typical chocolate turtle contains about 10-15 grams of sugar. To cut back, try using sugar alternatives like honey or maple syrup, which not only provide sweetness but also add unique flavors.
Fat Content
With rich chocolate and buttery caramel, you can expect the fat content to be relatively high—around 8-12 grams per serving. Most of this comes from the healthy fats in pecans. For more information on healthy fats, you might find this resource from the American Heart Association informative.
Enjoy these tasty treats, and don’t forget to share them with friends!
FAQs about Homemade Chocolate Turtles
Can I store these chocolate turtles?
Absolutely! Storing your chocolate turtles correctly can help maintain their delectable taste and texture. Simply place them in an airtight container, separating layers with parchment paper to avoid sticking. You can store them at room temperature for a few days, but if you want to enjoy them for longer, the refrigerator is your best friend. Just ensure they’re covered to prevent them from absorbing any unwanted odors.
How long will homemade chocolate turtles last?
When stored properly, your delightful chocolate turtles can last up to two weeks in the fridge. However, if you prefer an even longer shelf life, consider freezing them. They can generally stay fresh for about three months in the freezer. Just remember to let them thaw at room temperature before indulging in those rich, gooey bites!
Is there a way to make this recipe vegan?
Definitely! Making vegan chocolate turtles is easier than you might think. Swap out traditional caramel for a plant-based alternative made from coconut milk or date caramel. You can use dark chocolate that is dairy-free—many brands like Enjoy Life or Hu Chocolate offer delicious options. For the nuts, feel free to choose your favorites, such as pecans or cashews, and skip the butter entirely for a healthier twist.
For more information on vegan alternatives, check out resources like the Plant Based Foods Association. Creating your version of chocolate turtles allows you to indulge without compromising your values!
By addressing these common questions, we hope to inspire your culinary journey. Enjoy making your homemade chocolate turtles!
Conclusion on Homemade Chocolate Turtles
Final thoughts on indulging in homemade sweets
Creating your own chocolate turtles is not just about satisfying a sweet tooth; it’s about the joy of crafting something delicious. The combination of melting chocolate, gooey caramel, and crunchy nuts creates an irresistible treat that is perfect for sharing or enjoying by yourself.
What’s even better? These homemade delights offer a customized experience where you can add your favorite nuts or perhaps experiment with flavors. After all, everyone deserves a little indulgence now and then! So gather your ingredients, invite some friends over, and make it an enjoyable cooking session. You might even inspire a new holiday tradition! For more sweet inspirations, check out BBC Good Food or Food Network.
PrintChocolate Turtles: Indulgent Treats You Can Easily Make at Home
Indulge in homemade chocolate turtles that combine the rich flavors of chocolate, caramel, and pecans.
- Prep Time: 20 minutes
- Cook Time: 15 minutes
- Total Time: 35 minutes
- Yield: 24 turtles 1x
- Category: Dessert
- Method: Stovetop
- Cuisine: American
- Diet: Vegetarian
Ingredients
- 2 cups pecans
- 1 cup granulated sugar
- 1/2 cup heavy cream
- 1 teaspoon vanilla extract
- 8 ounces semi-sweet chocolate, chopped
Instructions
- Toast the pecans in a skillet over medium heat until fragrant.
- In a saucepan, combine sugar, cream, and vanilla; cook until the mixture reaches a caramel-like consistency.
- Place clusters of pecans on a baking sheet and drizzle warm caramel over them.
- Melt the chocolate and dip the caramel-covered pecans into the chocolate.
- Let them cool completely before serving.
Notes
- Ensure the pecans are toasted for enhanced flavor.
- You can use dark chocolate for a richer taste.
Nutrition
- Serving Size: 1 turtle
- Calories: 150
- Sugar: 14g
- Sodium: 5mg
- Fat: 10g
- Saturated Fat: 5g
- Unsaturated Fat: 4g
- Trans Fat: 0g
- Carbohydrates: 15g
- Fiber: 1g
- Protein: 2g
- Cholesterol: 10mg
Keywords: Chocolate Turtles, homemade chocolate, dessert