Introduction to Gluten-Free Mini Cheesecakes
When it comes to desserts, few things satisfy as much as a rich, creamy cheesecake. But if you or someone close to you follows a gluten-free diet, traditional cheesecakes can feel off the menu. That’s where gluten-free mini cheesecakes come into play – a delightful treat that’s just as indulgent, minus the gluten!
Why Choose Gluten-Free Mini Cheesecakes?
So, why opt for these scrumptious little bites? First and foremost, they cater to those with gluten sensitivities. According to the Celiac Disease Foundation, the prevalence of celiac disease is on the rise, affecting about 1 in 133 people in the U.S. This means that for many, enjoying desserts can lead to discomfort without a gluten-free option.
However, gluten-free doesn’t have to mean a compromise on flavor or texture. With the right ingredients, gluten-free mini cheesecakes can be just as creamy and satisfying as their gluten-filled counterparts. Plus, their mini size makes them perfect for portion control or serving at gatherings, ensuring everyone gets a sweet little treat.
Instead of traditional graham cracker crusts that typically contain gluten, our mini cheesecakes can use alternatives like crushed gluten-free cookies or even oats, paired with melted butter or coconut oil. These changes not only keep the treat gluten-free but also add unique flavors that elevate the overall dessert experience.
Let’s not forget about the versatility! You can easily customize your mini cheesecakes with different toppings—think fresh berries, drizzled chocolate, or even a dollop of coconut cream. The possibilities are endless.
Whether you’re preparing for a casual weeknight dessert or bringing a special dish to a gathering, these gluten-free mini cheesecakes deliver both ease and elegance. They are a perfect choice for packed lunches, quick snacks, or even a sweet surprise for your co-workers.
So grab your ingredients, and get ready to whip up something that everyone can enjoy. Ready to dive in? Let’s get baking!
Ingredients for Gluten-Free Mini Cheesecakes
Creating gluten-free mini cheesecakes doesn’t require a long list of exotic ingredients. Here’s what you’ll need to whip up these delightful treats:
List of ingredients needed
-
Crust:
-
1 cup gluten-free graham cracker crumbs
-
1/4 cup melted butter or coconut oil
-
2 tablespoons sugar
-
Filling:
-
16 oz cream cheese, softened
-
1/2 cup granulated sugar
-
2 large eggs
-
1 teaspoon vanilla extract
-
Optional: 1/4 cup sour cream or Greek yogurt for added creaminess
Where to find gluten-free options
Most grocery stores now offer a wide range of gluten-free products. Check the baking aisle for gluten-free graham crackers or visit dedicated sections for gluten-free items. Brands like Pamela’s and Kinnikinnick have excellent options. Always look for packaging that indicates “certified gluten-free” to ensure safety. You can even find these ingredients online, making it super convenient for busy young professionals like you who might not have time to rummage through stores.
Once you have these ingredients, you’re well on your way to creating delicious gluten-free mini cheesecakes!
Feel free to get creative with toppings—like fresh berries or a drizzle of chocolate sauce—to make them your own!
Preparing Gluten-Free Mini Cheesecakes
If you’re anything like me, there’s nothing quite as delightful as a rich and creamy cheesecake. And what could be better than gluten-free mini cheesecakes that are both easy to make and perfect for sharing (or indulging solo)? Let’s dive into the preparation process so you can whip up a batch of these heavenly treats with ease.
Preheat the oven and prepare the muffin tin
Before we get into the delicious details, let’s get the oven rolling. Start by preheating it to 325°F (160°C). This temperature is ideal for delivering that perfectly baked cheesecake texture—smooth and creamy while maintaining a light firmness.
Next up, grab a 12-cup muffin tin and line it with gluten-free cupcake liners. If you don’t have those handy, you can grease the tin with a bit of cooking spray or butter—just make sure it’s well-coated to prevent any stickiness.
Make the graham cracker crust
A great cheesecake starts with an equally excellent crust. For our gluten-free version, we’ll be using gluten-free graham cracker crumbs. You can find these in most grocery stores or you can easily make your own by crushing gluten-free cookies.
Here’s how to create your crust:
- Ingredients:
- 1 cup gluten-free graham cracker crumbs
- 1/4 cup melted butter
- 2 tablespoons sugar
Start by mixing the graham cracker crumbs, melted butter, and sugar in a bowl until well combined. The mixture should resemble wet sand. Press this mixture firmly into the bottom of each muffin liner, making sure it’s compact. This will ensure that your crust holds up well under the rich cheesecake filling.
Beat the filling ingredients until smooth
Now comes the fun part—creating that luscious cheesecake filling!
- Ingredients:
- 16 oz cream cheese, softened
- 1/2 cup granulated sugar
- 2 large eggs
- 1 teaspoon vanilla extract
- 1/4 cup sour cream or Greek yogurt (for extra creaminess)
Using an electric mixer, beat the softened cream cheese until it’s nice and smooth, with no lumps. Gradually add in the sugar until well blended. Next, add the eggs one at a time, mixing well after each addition, followed by the vanilla extract and sour cream. The goal here is a velvety-smooth consistency that hugs your palette with each bite.
Assemble the mini cheesecakes
It’s time to bring our components together! Spoon the filling into each muffin liner on top of the graham cracker crust. Aim to fill them about 3/4 full to allow for a little rising, but not too much that they overflow. Toppings are optional, but if you’re feeling adventurous, you can add a dollop of fruit preserve or a sprinkle of chocolate chips on top of the filling.
Bake and cool the mini cheesecakes
Place your filled muffin tin in the preheated oven and bake for 20-25 minutes. The edges should be set while the center remains slightly jiggly; it will firm up as it cools. Once they’re done baking, turn off the oven and crack the oven door. Let the mini cheesecakes cool in the oven for about 30 minutes.
After removing them from the oven, let them cool completely at room temperature, followed by a chill in the refrigerator for at least 2 hours—ideally overnight! This step is crucial for ensuring they slice beautifully.
Once your gluten-free mini cheesecakes are set, feel free to serve them chilled or with your favorite toppings. They’re a perfect treat for gatherings or a sweet indulgence after a long day. You won’t be able to resist snagging another!
If you’re excited to share these delights with friends or maybe even want to explore more about creative dessert ideas, head over to The Kitchn or Food Network for more inspiration. Enjoy baking!
Variations on Gluten-Free Mini Cheesecakes
If you’re a fan of gluten-free mini cheesecakes, you’re in for a treat! These delightful desserts are versatile, allowing you to tailor them to your taste preferences. Let’s dive into some exciting variations to elevate your cheesecake game!
Different Crust Options
The base of your gluten-free mini cheesecakes can set the entire tone. Here are a couple of crust alternatives to consider:
-
Almond Flour Crust: A classic choice packed with nutrients, almond flour provides a nutty flavor and a slightly chewy texture. Mix it with melted coconut oil and a sweetener of your choice for a delicious twist.
-
Chocolate Cookie Crust: If you’re craving something more indulgent, try using gluten-free chocolate cookies. Crush them up and combine them with melted butter for a rich, chocolatey base.
Flavor Variations for the Filling
When it comes to the cheesecake filling, the possibilities are truly endless! Here are some flavor inspirations that will keep your taste buds dancing:
-
Classic Vanilla Bean: Add vanilla extract and fresh vanilla beans to create a timeless favorite that highlights the creamy texture.
-
Berry Bliss: Swirl in your choice of pureed raspberries, strawberries, or blueberries for a fruity punch. Make it seasonal by using whatever berries are fresh in your market!
-
Chocolate Lover’s Delight: For chocolate enthusiasts, mix in some melted dark chocolate and a sprinkle of cocoa powder to make a dreamy chocolate version.
-
Lemon Zest: Incorporate fresh lemon juice and zest for a refreshing zing that’s perfect for summer gatherings.
Experimenting with these crusts and fillings not only makes your gluten-free mini cheesecakes a personal masterpiece, but it also impresses your friends at the next get-together! For more cooking tips and delicious ideas, check out resources like Serious Eats or BBC Good Food. Enjoy your baking adventure!
Cooking Tips and Notes for Gluten-Free Mini Cheesecakes
Helpful tips for a smooth filling
Achieving a silky and smooth filling for your gluten-free mini cheesecakes is easier than you might think! Here are a few friendly reminders:
- Room Temperature Ingredients: Always, and I mean always, use cream cheese and eggs at room temperature for a consistent mixture. Cold ingredients can lead to lumps.
- Mix Gently: When blending your filling, be gentle to avoid aerating it too much. A smooth, creamy texture comes from a delicate touch, not an aggressive beating.
- Avoid Overmixing: Once you’ve combined the ingredients, mix just until smooth. Overmixing can introduce too much air, leading to cracks as they bake.
Storing mini cheesecakes
Want to make these delectable treats ahead of time? Here’s how to store your gluten-free mini cheesecakes effectively:
- Refrigerate: Keep your cheesecakes in an airtight container in the fridge for up to five days. They are best enjoyed cold!
- Freezing Option: If you want to save some for later, you can freeze them for up to two months. Just make sure to wrap each cheesecake individually in plastic wrap and then place them in a freezer-safe bag.
For more tips on gluten-free baking, consider checking out Gluten-Free Baking Tips for expert advice!
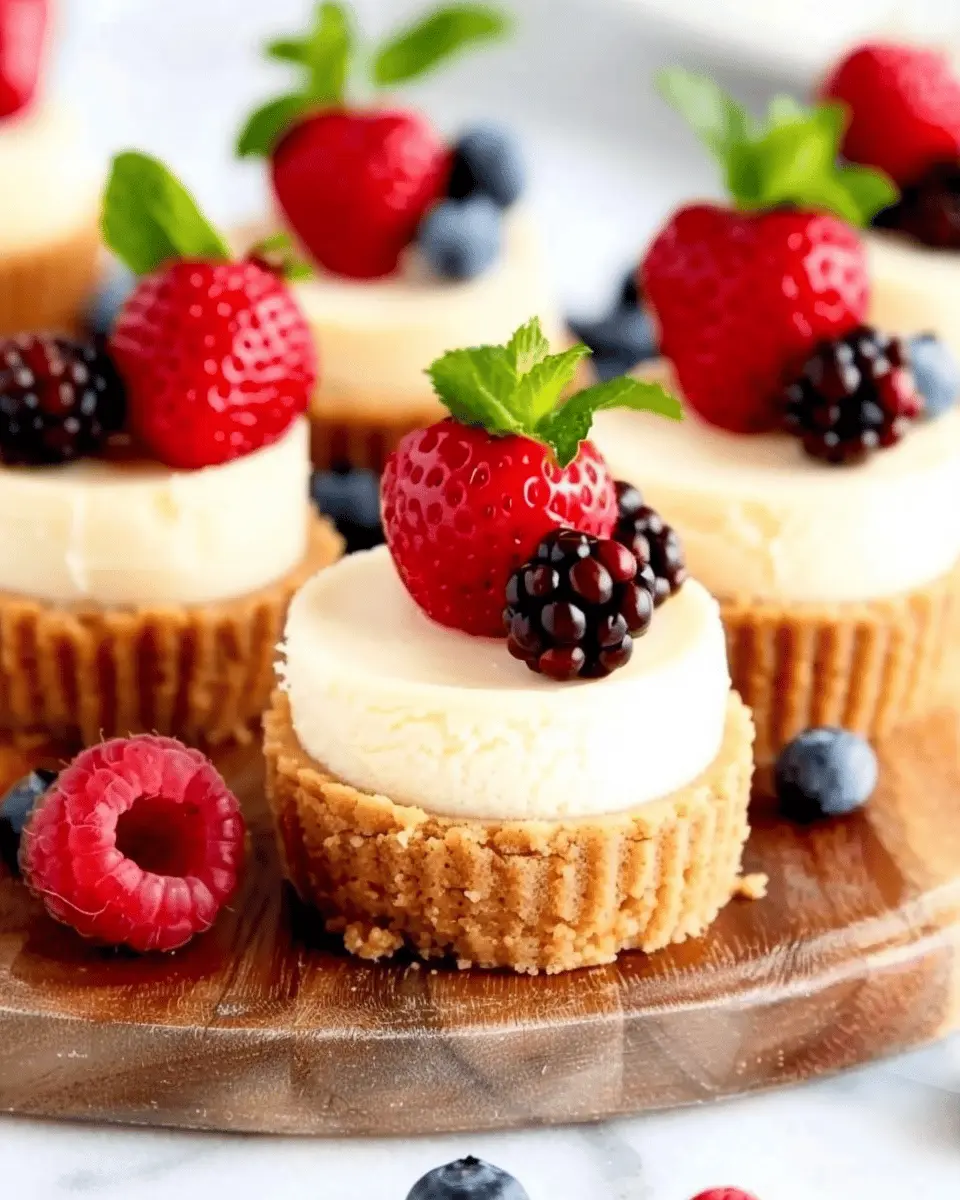
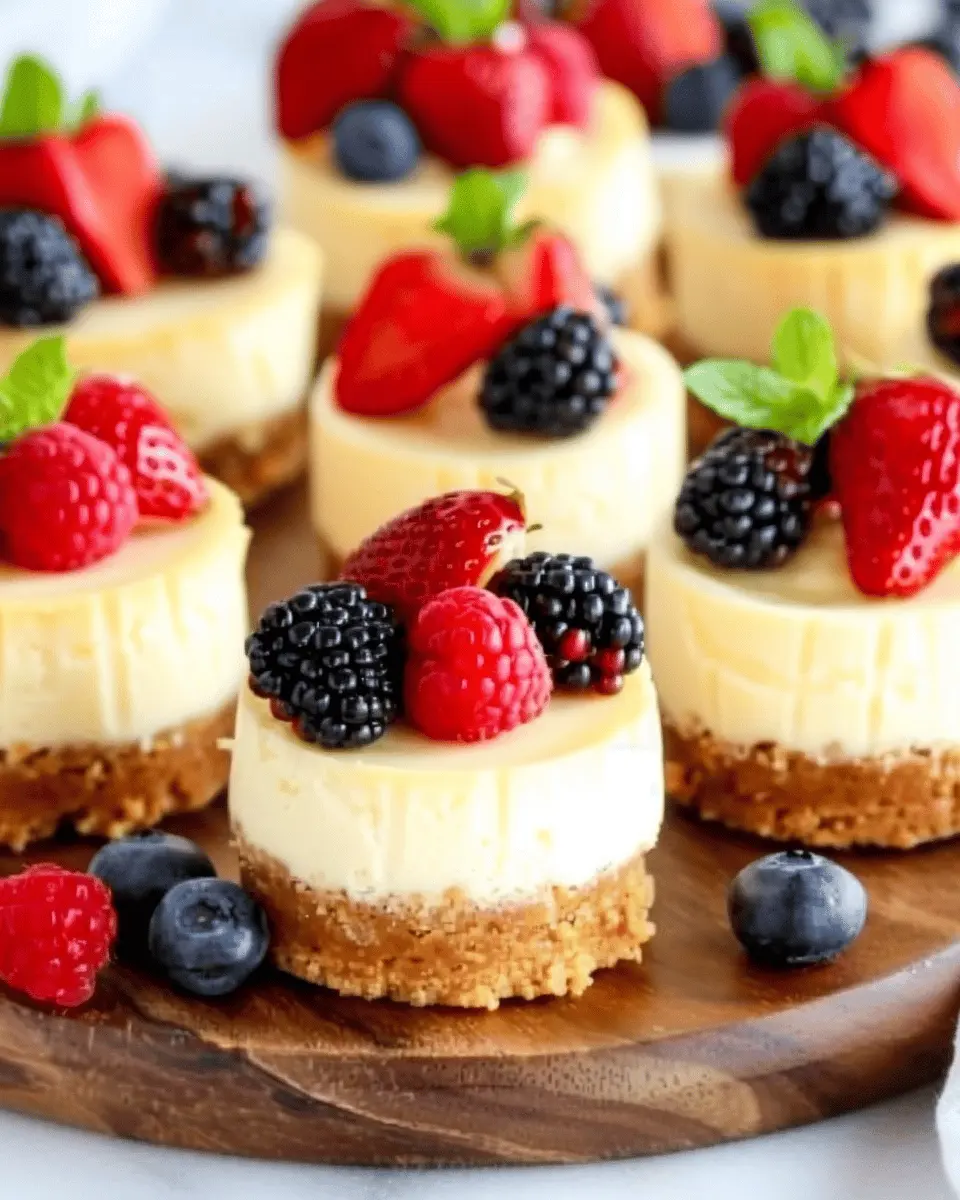
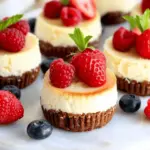
Serving Suggestions for Gluten-Free Mini Cheesecakes
Topping Ideas for Mini Cheesecakes
When it comes to gluten-free mini cheesecakes, the sky’s the limit for toppings! Think beyond the classic and get creative. Here are some delicious ideas to elevate your mini cheesecakes:
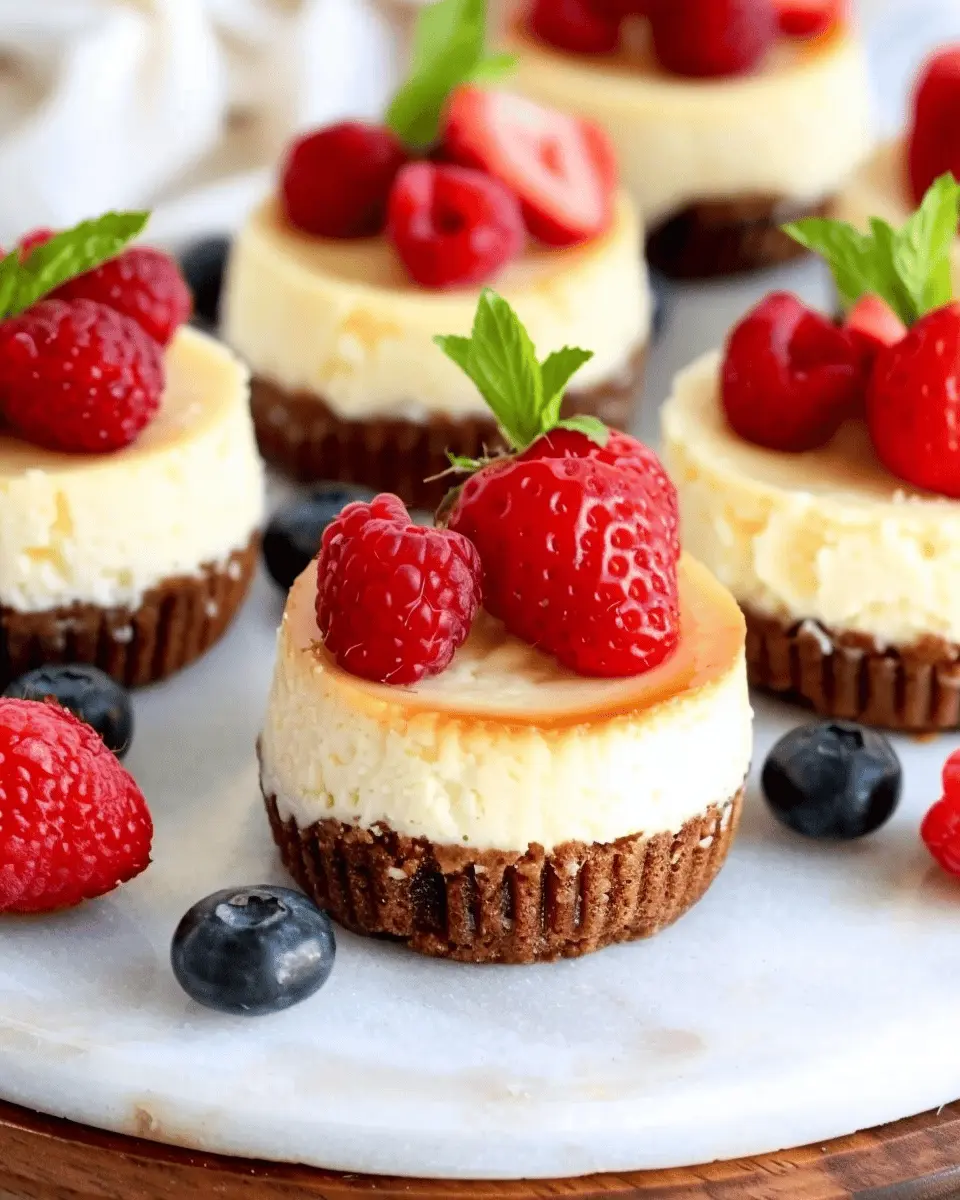
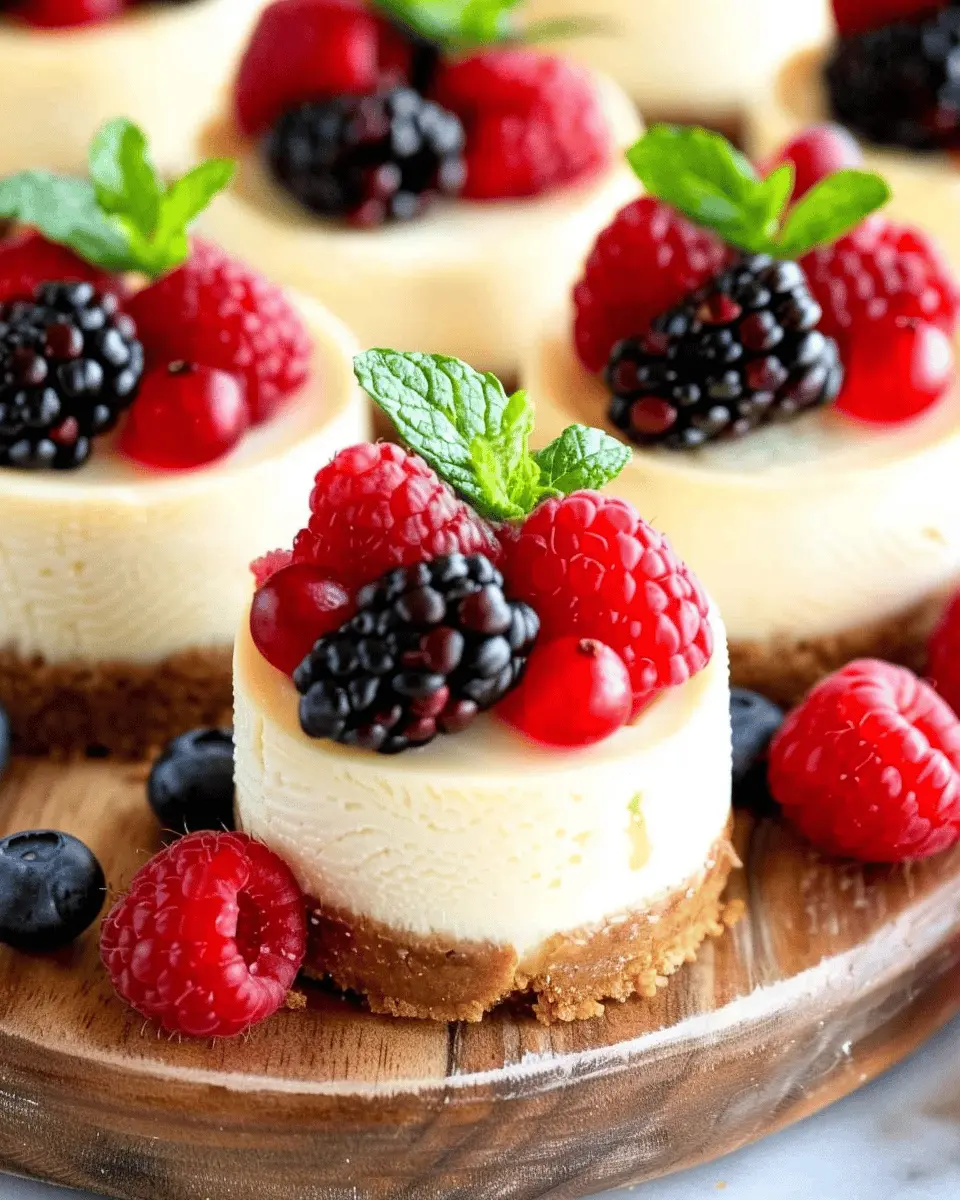
- Fresh Berries: Strawberries, blueberries, or raspberries add a pop of color and a burst of flavor. Their natural sweetness pairs beautifully with the rich cheesecake.
- Chocolate Ganache: Drizzle warm chocolate ganache over the top for a decadent touch that chocolate lovers will adore.
- Caramel Sauce: A drizzle of homemade or store-bought caramel adds an indulgent, sweet finish.
- Whipped Cream: A dollop of whipped cream on top makes everything feel extra special, and you can even infuse it with vanilla or almond extract for added flair.
Presentation Tips for Gatherings
Serving gluten-free mini cheesecakes at your next gathering? Presentation is key! Here are some tips to impress your guests:
- Individual Servings: Use clear cupcake liners or small mason jars to showcase each mini cheesecake. This not only looks appealing but also makes serving easy.
- Garnish Plates: Surround your cheesecakes with fresh fruits or edible flowers to create a colorful display.
- Label Options: In case of any dietary restrictions, label your gluten-free mini cheesecakes. This shows consideration for guests and makes it easier for everyone to enjoy.
By putting a little thought into toppings and presentation, your gluten-free mini cheesecakes can be the highlight of any event! For more ideas on celebrating with culinary delights, check out Taste of Home for dessert inspiration.
Time Breakdown for Gluten-Free Mini Cheesecakes
When you decide to whip up gluten-free mini cheesecakes, it’s helpful to know how your time will break down. Here’s a handy guide to plan your baking adventure!
Preparation Time
Getting ready is half the fun! You’ll need about 15-20 minutes to gather ingredients, prep your baking pan, and mix the cheesecake batter. Don’t rush; enjoy the process and savor that sweet anticipation.
Baking Time
Baking these delightful mini treats will take 20-25 minutes. Keep an eye on them once the timer goes off; they should be just set in the center.
Refrigeration Time
Patience is key! For the best flavor and texture, let your gluten-free mini cheesecakes chill in the fridge for at least 3 hours (or overnight, if you can resist!). This step is crucial for achieving that creamy goodness.
With a little planning, you’ll have delectable cheesecakes ready for your next gathering! For more tips on gluten-free baking, check out this resource for expert advice.
Nutritional Facts for Gluten-Free Mini Cheesecakes
Calories per mini cheesecake
Indulging in gluten-free mini cheesecakes can be guilt-free, especially knowing that each delightful serving contains around 150 calories. This makes them a great option for satisfying your sweet tooth without overloading on calories.
Key nutritional components
Let’s break down what you’re getting nutritionally:
- Protein: Approximately 4g per cheesecake, helping keep you fuller longer.
- Fats: About 10g, primarily from cream cheese and a touch of almond flour.
- Carbohydrates: Ranges around 12g, offering a balanced energy boost.
- Fiber: Each cheesecake has about 1g, supporting digestion.
These delightful treats can fit into a variety of diets—check out more about balanced eating here for helpful tips! Remember, while they’re gluten-free, moderation is key; enjoy your creations as part of a well-rounded diet.
FAQs about Gluten-Free Mini Cheesecakes
Can I make these mini cheesecakes dairy-free?
Absolutely! You can enjoy gluten-free mini cheesecakes without dairy by substituting traditional cream cheese with dairy-free alternatives. Brands like Tofutti or Miyoko’s offer great vegan cream cheese options. Coconut cream is another popular choice that adds a rich, creamy texture. Just ensure that your other ingredients, like the crust, are also dairy-free. Check out resources like Nutritional Healing for more on dairy substitutes.
How do I prevent cracks on the surface?
Cracked cheesecake is a common concern, but you can easily avoid this with a few tips:
- Mix gently: Overmixing can incorporate too much air, resulting in cracks as the cheesecake sets.
- Room temperature ingredients: Use room temperature cream cheese and eggs, as this helps in achieving a smoother batter.
- Water bath method: Baking within a water bath helps moderate the temperature around your mini cheesecakes, preventing them from cooking too fast and cracking. For a solid explanation on this technique, see Baker’s Journal.
What’s the best way to store leftovers?
Storing your gluten-free mini cheesecakes properly will keep them fresh and delicious! Here’s how:
- Chill first: Always allow your cheesecakes to cool completely before storing.
- Use airtight containers: They can last in the fridge for about 3-5 days. Make sure to layer parchment paper between them if stacking.
- Freezing option: You can freeze mini cheesecakes for up to two months. Just wrap them tightly in plastic wrap and then in foil. When you’re ready to enjoy again, thaw them in the fridge overnight.
If you have more questions or want to explore more dairy-free recipes, feel free to explore articles on Mindful Health. Happy baking!
Conclusion on Gluten-Free Mini Cheesecakes
In conclusion, these gluten-free mini cheesecakes are not only an indulgent treat but also remarkably easy to make. If you’re looking for a delightful dessert that aligns with your dietary preferences, these little bites of heaven hit the mark. Just imagine taking your first bite—the creamy filling paired with a crunchy crust exudes pure bliss.
Plus, with a few simple ingredients and minimal prep time, you’ll be dishing out smiles in no time. So why not gather your friends for a taste test? You’ll find that everyone, whether gluten-sensitive or not, will be reaching for seconds! For more mouth-watering dessert ideas, check out Healthline’s article on gluten-free foods.
PrintGluten-Free Mini Cheesecakes: Indulgent Treats for Everyone
Delicious and indulgent, these gluten-free mini cheesecakes are perfect for everyone to enjoy.
- Prep Time: 15 minutes
- Cook Time: 30 minutes
- Total Time: 2 hours 45 minutes
- Yield: 12 servings 1x
- Category: Desserts
- Method: Baking
- Cuisine: American
- Diet: Gluten-Free
Ingredients
- 1 cup gluten-free graham cracker crumbs
- 1/4 cup unsalted butter, melted
- 2 cups cream cheese, softened
- 1 cup granulated sugar
- 1 teaspoon vanilla extract
- 3 large eggs
- 1/4 cup sour cream
Instructions
- Preheat the oven to 325°F (160°C).
- Combine gluten-free graham cracker crumbs and melted butter in a bowl.
- Press the mixture into the bottom of mini cheesecake pans.
- In a mixing bowl, beat the cream cheese until smooth.
- Add sugar and vanilla extract, continue mixing.
- Incorporate eggs one at a time, mixing well after each addition.
- Mix in sour cream until fully combined.
- Pour the cream cheese mixture over the crust in the pans.
- Bake for 25-30 minutes or until set.
- Allow to cool, then refrigerate for at least 2 hours before serving.
Notes
- For a different flavor, add fruit toppings like strawberries or blueberries.
- Ensure all ingredients are gluten-free to maintain the recipe’s integrity.
Nutrition
- Serving Size: 1 mini cheesecake
- Calories: 220
- Sugar: 14g
- Sodium: 150mg
- Fat: 15g
- Saturated Fat: 9g
- Unsaturated Fat: 5g
- Trans Fat: 0g
- Carbohydrates: 20g
- Fiber: 0g
- Protein: 3g
- Cholesterol: 45mg
Keywords: Gluten-Free Mini Cheesecakes, Mini Cheesecakes, Gluten-Free Desserts